RSS
Showing posts with label Hot Thai Kitchen. Show all posts

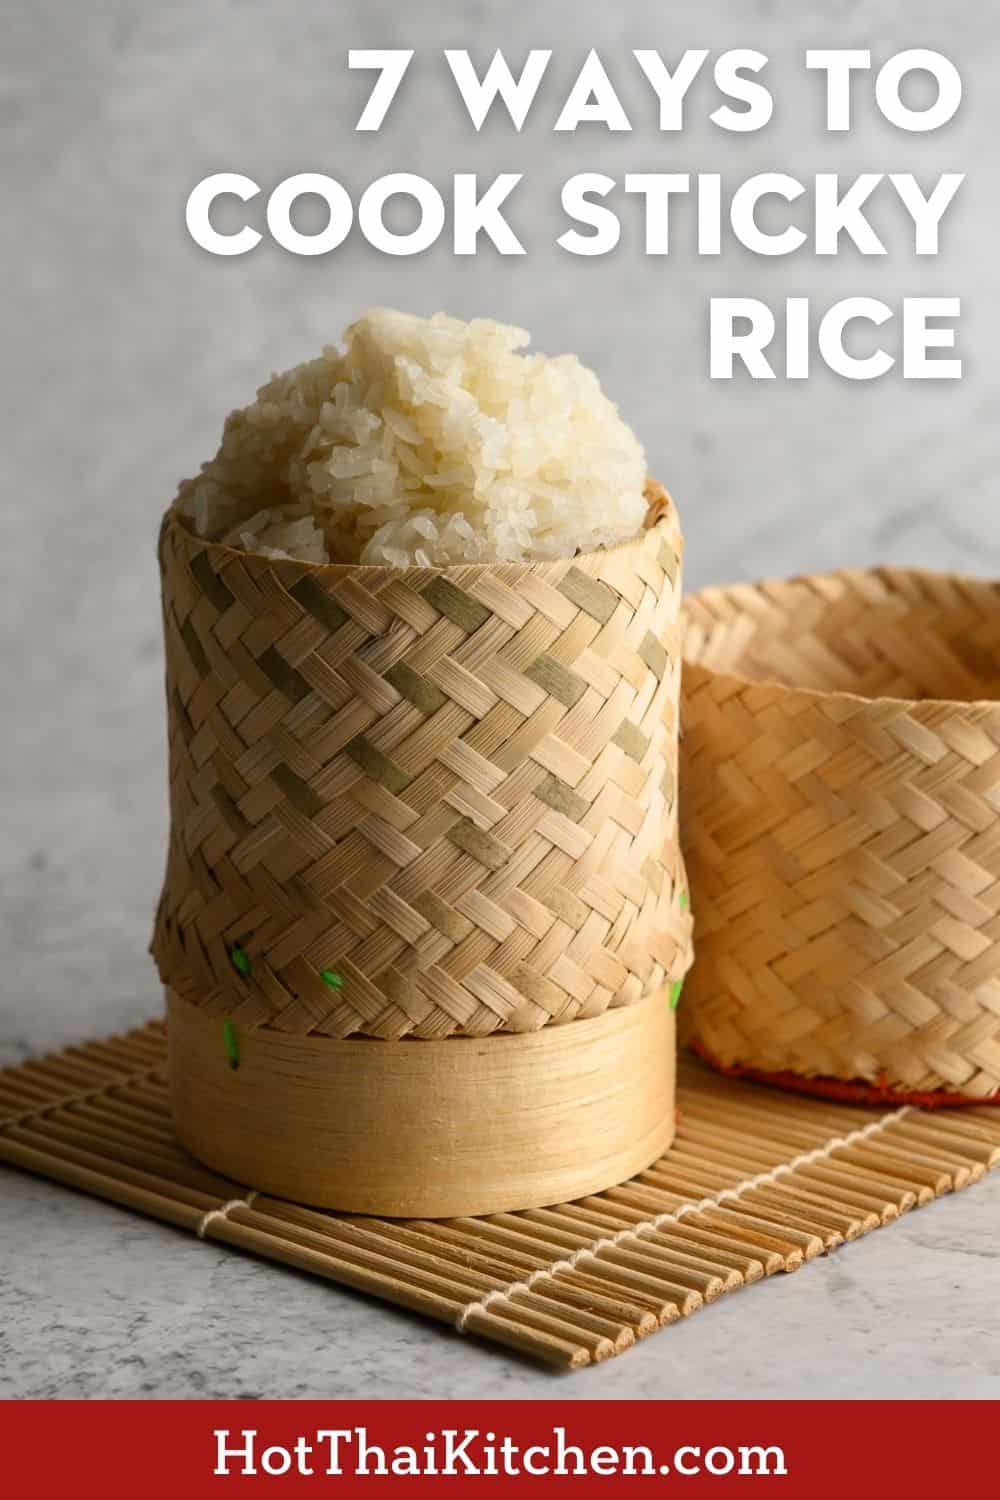
7 Ways to Make Thai Sticky Rice (with Bonus Hack!)

Why Cooking Sticky Rice is (a bit) Tricky

Why are there at least 7 ways to cook sticky rice, and why are none of them just…throwing rice into a pot of water like you do with any other kind of rice? Well, it’s because Thai sticky rice is a little bit…sensitive.

Trust me, if you could cook it like regular rice the whole nation of Thailand wouldn’t do it any other way. Sticky rice can’t absorb much water, and it is not forgiving at all if you add even a bit too much – so cooking it in water willy-nilly can result in mushy rice very easily.

So the wise people of the past discovered that if you soak the rice in water for at least 3 hours until it is completely saturated, and then steam it OUT of water, there is no chance that it can overcook. Brilliant, right?

But not all of us have the time or the equipment to do it traditionally, so here’s my roundup of all the ways that I know of that you can cook sticky rice, along with the pros and cons of each method.

To Soak, or Not to Soak?

The 7 methods can be divided into 2 categories: soak and steam, and no soak. Usually, the results are better using the soak-and-steam methods for the reasons I described above, but if you’re short on time there are options!

What Do I Eat Sticky Rice With?

Generally, we love it with meats. Here are a few classic meat dishes that are often paired with sticky rice:

Or try it with northern Thai food, which is commonly eaten with sticky rice. You can dip it into the thick sauce of Hung Lay curry; or if you like carb-on-carb, it’s fantastic with spicy curry glass noodle stir-fry.

Print
sticky rice

7 Ways to Make Thai Sticky Rice

  • Author: Pailin Chongchitnant

Ingredients

Thai glutinous rice, aka “Thai sweet rice”. I recommend cooking around ⅓ – ½ cup uncooked sticky rice per person.


Instructions

SOAK & STEAM METHODS:

Step 1: Wash your rice in room temp water for a few times until the water runs mostly clear. [Video 00:58] This is absolutely necessary regardless of which method you choose, otherwise you will end up with gummy rice!

Step 2: Soak your rice [Video 01:45] in room temp water for a minimum of 3 hours, preferably 4 (especially if your rice is old), and for up to 12 hours.

Step 3: Drain the rice and steam for 20-25 minutes (may take longer if making a lot), using any of the following implements (see video at the time indicated for details):

  1. Bamboo Cone Steamer [Video 02:27]
  2. Steamer Rack + Cloth [Video 04:50]
  3. Metal Sieve [Video 06:39]
  4. HACK for extra soft sticky rice, and highly recommended if you are serving rice at room temp: Soak-Steep-Steam [Video 07:26]

NO SOAK METHODS (cooking rice in water):

Step 1: Wash your rice. [Video 00:58]

Step 2: Drain your rice EXTREMELY WELL. You want to use a sieve, then shake and shake until water is no longer dripping from the rice. As I mentioned above, sticky rice overcooks very easily. So if we’re going to cook sticky rice IN water it’s important that you do not accidentally use too much water by not draining well enough.

Step 3: Cook the rice using any of the methods below. See video at the indicated time for details.

  1. No Soak – Steam-the-Bowl [Video 10:56]
  2. No Soak – Rice Cooker [Video 12:32]
  3. No Soak – Microwave [Video 14:52]

The post 7 Ways to Make Thai Sticky Rice (with Bonus Hack!) appeared first on Hot Thai Kitchen.


  • Digg
  • Del.icio.us
  • StumbleUpon
  • Reddit
  • RSS

LIVE Thai Fruit Carving Demo!

This is the edited version of the livestream with Chef Natawat (Farm) Noinith of the Thai Consul General Residence in Vancouver. In this Part 1, he shows us the basics of Thai fruit carving, and some easy stuff you can do at home to jazz up your plating!

Special thanks to the Thai Trade Center Vancouver for sponsoring this livestream.

Follow Chef Farm on Instagram at https://ift.tt/32guxB5

IF YOU LIKE THIS VIDEO, ALSO CHECK OUT:

The post LIVE Thai Fruit Carving Demo! appeared first on Hot Thai Kitchen.


  • Digg
  • Del.icio.us
  • StumbleUpon
  • Reddit
  • RSS

LIVE Royal Thai Cooking Demo!

Part 2 of the livestream that has been edited down. We are with Chef Natawat Noinith of the Thai Consul General Residence who is showing us how to make Thai “bird dumplings” ขนมจีบนก and a stuffed coconut pudding or “kanom sod sai” ขนมสอดใส้.

Special thanks to the Thai Trade Center Vancouver for sponsoring this livestream.

Follow Chef Farm on Instagram at https://ift.tt/32guxB5

IF YOU LIKE THIS VIDEO, ALSO CHECK OUT:

 INGREDIENTS FOR KANOM SOD SAI:

Filling:

  • 250 g grated coconut
  • 200 g palm sugar
  • 1/4 cup jasmine water
  • 1/4 tsp salt

Wrapper for filling:

  • 1/2 cup Glutinous rice flour
  • 1/2 cup black glutinous rice flour
  • Water, as needed

Coconut cream:

  • 3/4 cup rice flour
  • 3 cup coconut milk
  • 1/2 tsp salt

INGREDIENTS FOR BIRD DUMPLINGS:

Filling:

  • 260 g minced pork
  • 15 g paste of garlic, cilantro root, white peppercorn
  • 100 g palm sugar
  • 25 g fish sauce
  • 5 g oil

Dough:

  • 1 cup rice flour
  • 1 cup glutinous rice flour
  • 1 tbsp potato starch
  • 1 tbsp arrowroot starch
  • 280 g coconut milk
  • 10 g coconut oil
  • Extra for kneading: 1/4 cup potato starch 1/4 cup rice flour

The post LIVE Royal Thai Cooking Demo! appeared first on Hot Thai Kitchen.


  • Digg
  • Del.icio.us
  • StumbleUpon
  • Reddit
  • RSS

Thai-Style Chinese Doughnut (Pa Tong Go) ปาท่องโก๋

The Ultimate Thai Street Breakfast

When I think about the perfect Thai morning it involves a coffee, a glass of hot fresh soy milk, and a plate of these crispy, airy pa tong go.

Pa tong go is the Thai version of Chinese doughnuts or “you tiau” or “yao tiew”. Personally, I like the Thai version better, but yes, I’m biased! Most commonly you can find pa tong go sold by street carts in the morning. Sometimes the vendor also sells fresh soy milk, the perfect accompaniment, and if not, there’s usually a soy milk cart nearby.

My favourite way to eat them is to simply dip them in sweetened condensed milk, but I also love dipping them in sangkaya, a pandan coconut custard. If you don’t like things sweet in the morning, you can have them with a hot glass of fresh soy milk.

Key Ingredient: Baking Ammonia

The most important ingredient in this recipe is the leavening agent you may not have heard of before: baking ammonia or baker’s ammonia. Technically this is ammonium bicarbonate (even though on the label it says “carbonate”), and it works in a similar way as baking soda and baking powder, but is superior in a couple of ways.

Why I Chose Baking Ammonia

Look, I am just as annoyed as you are when I see a recipe calling for weird ingredients. And I REALLY do not like it when it’s my own recipes. But this means that when I do, you know there’s a good reason for it. In this recipe, the difference baking ammonia makes is absolutely worth the effort of looking for it. I got mine from a local cookware store that sells a lot of specialty baking ingredients, but it’s also available online on Amazon (linked through my Kit here).

Here are reasons why baking ammonia is superior in this recipe:

  1. It does not leave any aftertaste whatsoever. This is the most important reason. Baking powder and baking soda actually have a flavour, and it’s not pleasant. But when you make cakes or cookies, there are a lot of other flavours going on, and the amount of leavening used is quite small, so we don’t really notice it. Pa tong go dough, however, is so simple and plain, and it needs quite a lot of leavening agent to get the puffiness we need, so if you used baking powder or baking soda, you will actually be able to taste the alkaline flavour that they leave behind. Baking ammonia may start out with a really strong odour, but once it’s all cooked off, it leaves no smell or taste, leaving you with just the clean flavour of the delicious fried dough.
  2. It yields a crispier product. Baking ammonia is more commonly used than you may think. If you look at the ingredient list of store-bought crackers, you’ll likely see it listed. This is because baking ammonia produces a crispness in the product that baking powder or soda can’t. I don’t actually know the mechanism behind this, so if you know do share!
  3. It does not react until you cook it. Unlike baking powder/soda which start working as soon as you mix it with liquid, baking ammonia is activated by heat so ALL of it’s leavening power will be released during cooking, and none is lost while the dough is being mixed or resting. This means that you can make the dough in advance and let it sit until you need it. This is how pa tong go vendors in Thailand can just make the dough once and sell it over the course of the day with no issues.
  4. It’s the traditional way pa tong go is made in Thailand. For those of you who are looking to recreate the wonderful pa tong go experience you had in Thailand, well this is what they use!

*NOTE: Baking ammonia has a VERY strong odour, so DO NOT SMELL IT DIRECTLY, and when mixing the dough try not to put your nose right on top of it. All the smell will go away once the dough is properly cooked through. If you can smell ammonia in the finished product it means the dough is undercooked.
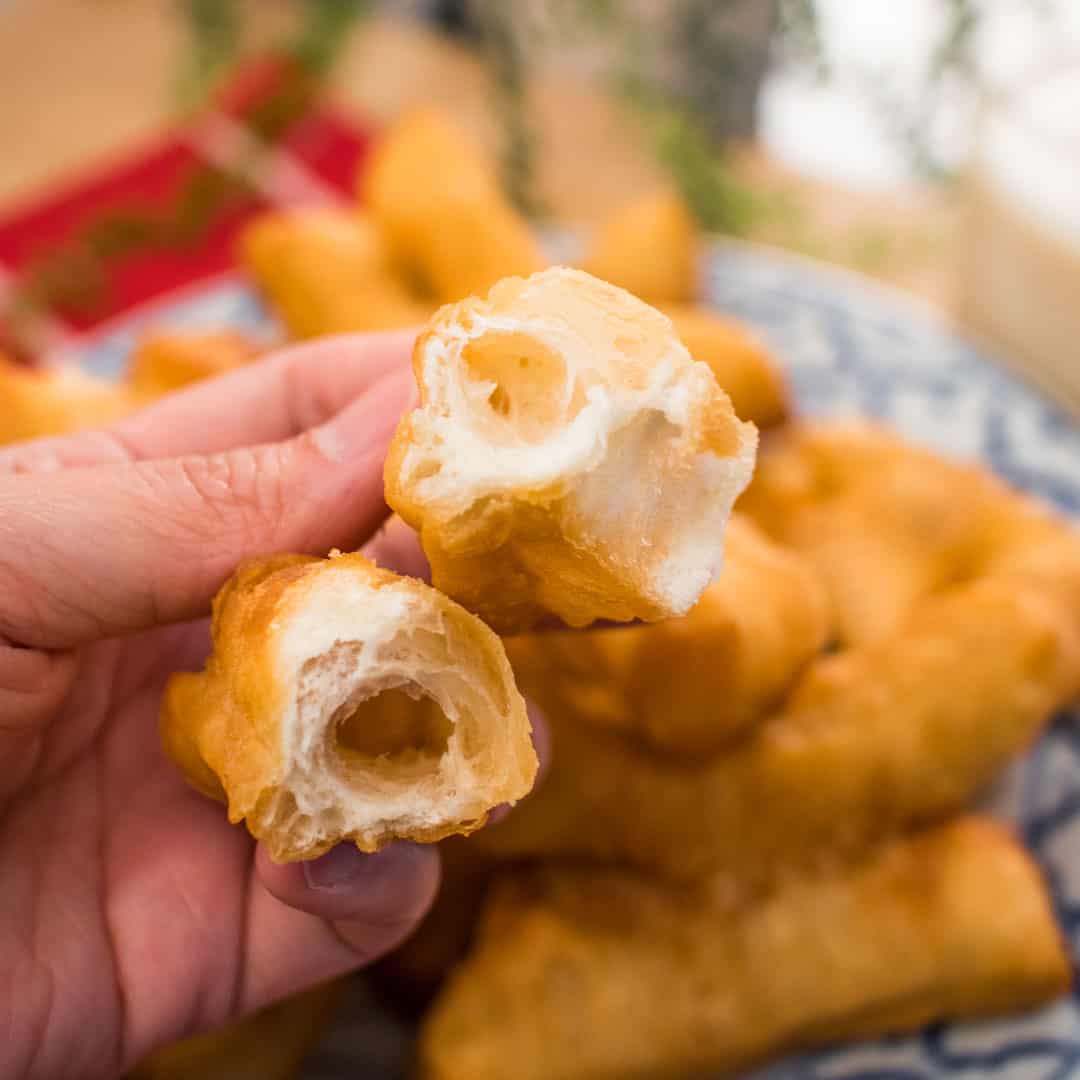
Crispy outside, hollow and airy inside are the key characteristics of the perfect pa tong go

Crispy outside, with a tender but hollow and airy inside are the key characteristics of the perfect pa tong go.

Prepping Dough in Advance

The dough needs to rest for 2.5-3 hours before you can fry it (although 2 hours is probably okay too, but I’ve never tried), but it also can rest there for up to 8 hours until you’re ready to fry it. If you want to prepare it in advance longer than that, put the dough in the fridge, but be sure to pull it out 2 hours before using so the dough has time to warm up to room temperature, and it’s harder to work with a cold dough.

Reheating Pa Tong Go

I really, REALLY think you should eat pa tong go as fresh as possible. Once it’s cool enough to eat but still a bit warm is perfect. It’s one of those things that just isn’t nearly as good once it’s been sitting out for a few hours. So I do not recommend making more than you can eat in one sitting.

But if you REALLY have to reheat them, there is a way to do it that will give a decent result. Not the same, but decent. If you have a toaster oven, stick them in there using the toast function for a few minutes only, once you start to see the oil on the surface start to sizzle it’s ready to go. For a regular oven, I use the broiler on low setting and broil each side for just 1-2 minutes or until the oil starts sizzling on the surface. Do not toast them too long or they will dry out and become too crispy.

Print
The ultimate Thai breakfast experience. This simple recipe is authentic and uses a key ingredient that yields the best, crispy, airy pa tong go, just like in Thailand! #thaifood #streetfood

Thai-Style Chinese Doughnut (Pa Tong Go) ปาท่องโก๋

  • Author: Pailin Chongchitnant
  • Yield: 12-14 pieces

Ingredients

  • 250 g all-purpose flour
  • 50 g cornstarch
  • 2 tsp vegetable oil
  • 1 tsp baker’s ammonia (ammonium bicarbonate, see above for more info)
  • 1 tsp fine table salt
  • 1 Tbsp sugar
  • 200 ml water
  • For serving: Sweetened condensed milk, coconut pandan custard, or hot fresh soy milk.

Instructions

  1. Sift flour and cornstarch together into a mixing bowl.
  2. Put water into a small bowl then add salt and sugar and stir until completely dissolved.
  3. Add baking ammonia and stir until dissolved (don’t put your nose directly over the water so you don’t get an accidental whiff of ammonia!)
  4. Stir the oil into the water and pour everything into the flour.
  5. Mix with your hand just until combined and no dry flour is left, it should only take 1-2 minutes. DON’T KNEAD. The dough should be shaggy and sticky, and does not look right (but it is!). Cover and rest for 2.5-3 hours.
  6. When ready to fry, preheat at least 1.5 inches of frying oil in a wide pot or wok to 375F.  Ideally, keep a deep-fry thermometer in the oil while you fry. If you don’t have a thermometer that can stay in the pot, check your oil temp often while you fry.
  7. While the oil is heating, prepare a large cutting board near the oil; this is your dough-shaping station.
  8. Dust the board thoroughly with flour, then turn the dough onto the board. Dust the top of the dough with more flour, then use your hands to pat the dough down into a ¼ inch thick rectangle, 7-8 inches wide, keeping the sides as straight as possible to minimize waste. Do not knead the dough and try to work it as little as possible.
  9. Cut the rectangle into 3 strips (each should be about 2 ¼ – 3 inches wide). Work with 1 strip at a time and keep the other 2 covered in a barely-moist kitchen towel or plastic wrap so they don’t dry out.
  10. Trim the ends of the strip to square them off, then cut the strip into 1-inch wide pieces.
  11. Dip a wooden skewer or a thin chopstick into a little cup of water and paint a 1-inch vertical strip of water into the center of every OTHER piece; this will be the glue. Put the dry piece on top of the wet piece and press gently in the center to stick them together. Once you’re done forming, if the oil still has a bit of time to go, cover the pieces to prevent drying.
  12. Right before you drop the pa tong go into the oil, stretch the piece out with your hands until it is about double in length and drop it into the oil. TIP: To help your oil last longer, brush off excess flour from the dough with a pastry brush before dropping them into the oil.
  13. Fry in oil for AT LEAST 5 minutes, flipping often, until well browned on both sides and bubbling has subsided. Keep an eye on oil temp and try to maintain it around 375F and don’t let it drop lower than 360F. If the oil accidentally drops below 360, add a little bit more frying time to make sure all the ammonia is cooked off.
  14. Place the finished pa tong go onto some paper towels to absorb the excess oil. Tip: Once the first piece is cool enough to handle, break it off and smell the inside to check if all the ammonia smell is gone. If not, you need to fry the next batch longer.
  15. Serve as soon as they’re cool enough to handle. Enjoy!

 

The ultimate Thai breakfast experience. This simple recipe is authentic and uses a key ingredient that yields the best, crispy, airy pa tong go, just like in Thailand! #thaifood #streetfood #chinesedoughnuts

The post Thai-Style Chinese Doughnut (Pa Tong Go) ปาท่องโก๋ appeared first on Hot Thai Kitchen.


  • Digg
  • Del.icio.us
  • StumbleUpon
  • Reddit
  • RSS

“Can’t-Stop” Candied Peanuts

A Classic Childhood Treat

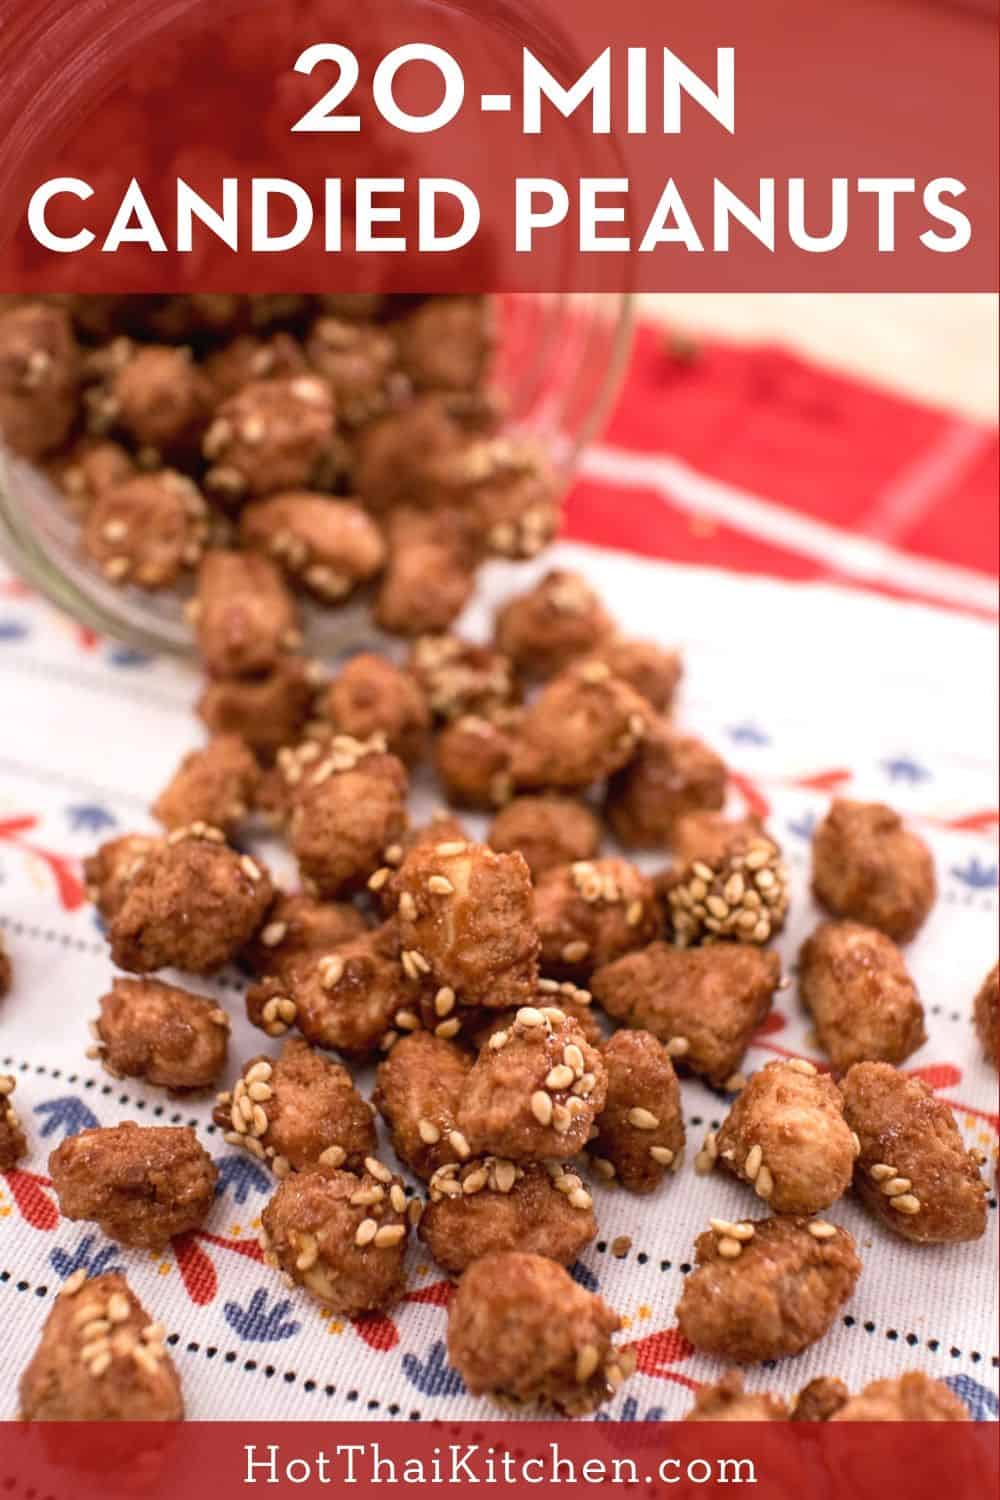
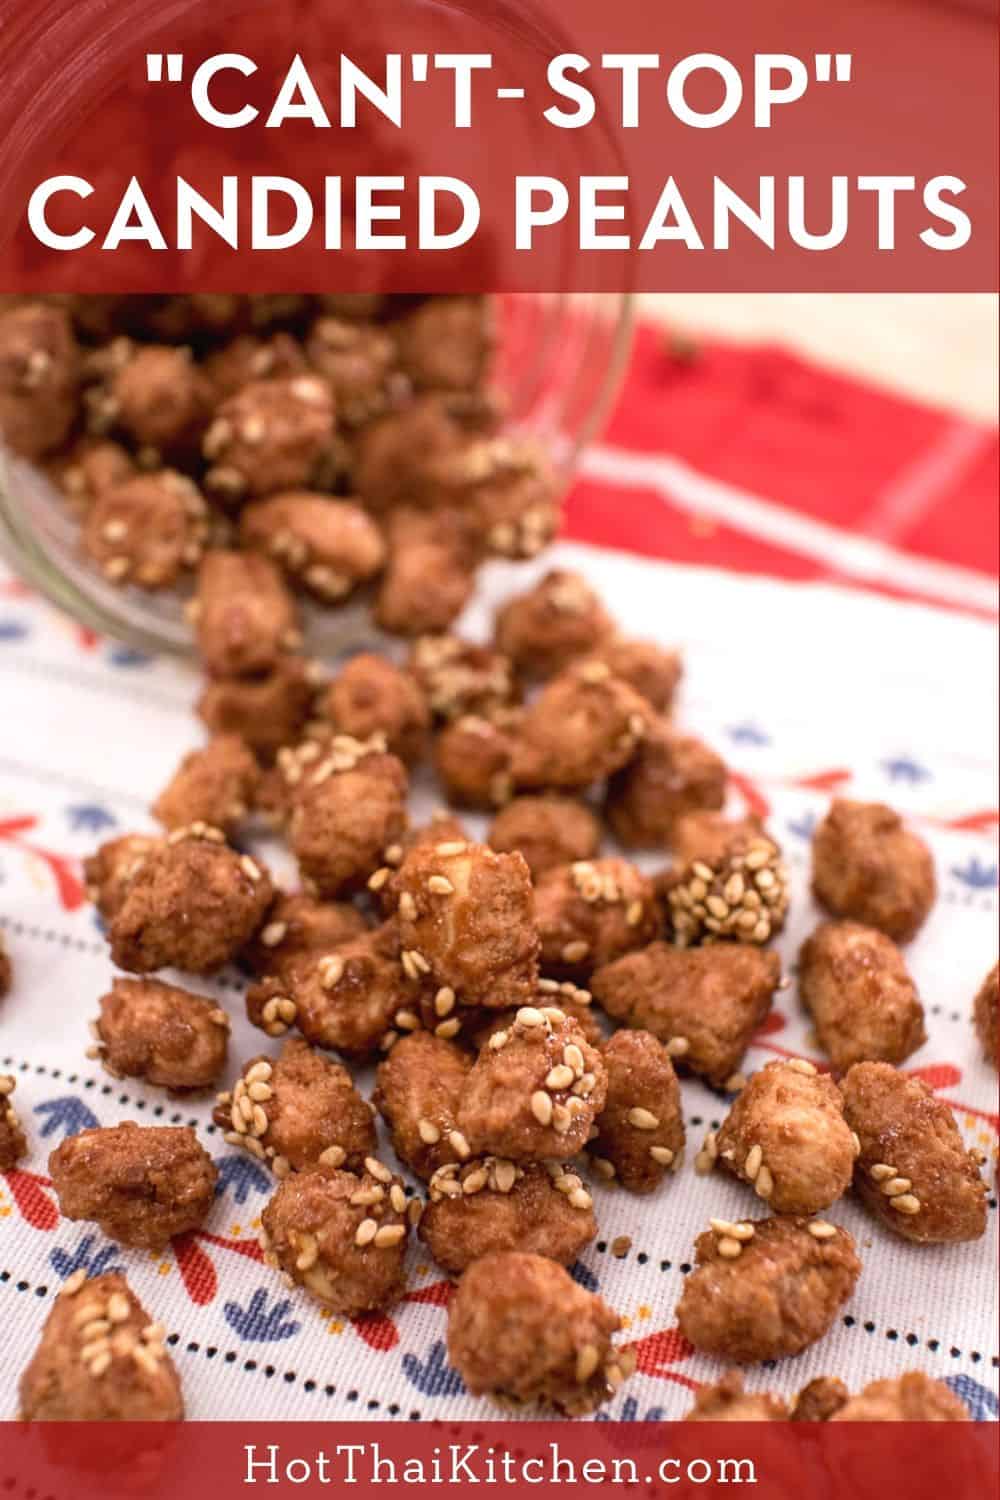
This recipe reminds me so much of my childhood. I used to eat these all the time, and in my hometown of Hat Yai you can find them anywhere kids’ snacks were sold. Peanuts coated in a crunchy sugar coating flavoured with Ovaltine and sometimes a little coffee. They’re rolled in toasted sesame seeds which reminds you of that munchiness of sesame snaps. Few snacks are more addictive than these!

Choosing The Right Peanuts

You want to find raw, skin-on peanuts for this recipe. The raw part isn’t as important as the skin-on part, but I don’t think they sell roasted skin-on peanuts!

The skin does two very important things, 1) Keeps the peanuts whole and not split, this is important because it affects the candy-to-peanut ratio; split peanuts will have too much sugar around them per piece, and 2) It help provide friction so the candy coating can stay on evenly. As you may discover, if some of the skins fall off during cooking, those naked peanuts won’t have as much sugar coating on them because the surface is too slippery.

You can find skin-on peanuts at most Asian supermarkets, but don’t even bother looking at Western stores (at least in Canada), I went just about everywhere and there were NONE to be found! If you have a choice, choose larger peanuts.

Can You Use Other Nuts?

YES! But if you want to try other nuts keep a few things in mind:

1) The shape. I tried these with mixed nuts just to see how different nuts perform and found that pecans, because of their flat shape and the grooves, ended up with too much sugar for my liking. I would imagine the same would be the case for walnuts. Again, it’s all about the surface area-to-volume ratio for optimal sweetness. Cashews also didn’t get as even of a coating because of the irregular shape, and the candy coating slipped off a bit cuz they are also slippery. Not to say that you can’t use these nuts, I just found that the result wasn’t ideal.

2) The skin. As mentioned above, the skin is important in getting the coating to stick on evenly, so don’t use blanched almonds, for example.

3) Of the mixed nuts I tried, almonds were my favourite in all respects—flavour, crunch, size, evenness of coating, and they’re widely available! You CAN use roasted almonds too if you cannot find raw ones. FYI pistachios are similarly shaped to peanuts and performed well in the way they looked, but they’re not as crunchy and the flavour didn’t work as well.

Print
Super addictive snacks that can be easily made in 20 minutes. Peanuts coated in crunchy candy and fragrant sesame seeds! #glutenfree #vegan #thaifood

Can’t-Stop Candied Peanuts

  • Author: Pailin Chongchitnant
  • Yield: 3 cups

Description

This recipe is easy, but I highly recommend you watch the video first as it’s immensely helpful to see what they’re supposed to look like at each stage.


Ingredients

  • 200 g raw, skin-on peanuts
  • 160 g sugar
  • 2 tsp Ovaltine powder, Milo powder, or 1 tsp cocoa powder (see note)
  • ½1 tsp instant coffee granules (optional, see note)
  • ¼ cup coconut milk
  • ⅓ cup water
  • ½ tsp fine salt
  • 2 Tbsp white sesame seeds, toasted

Notes:

  1. Ovaltine or Milo are chocolate malt drink mix powders that are popular in Asia. If you don’t have it, just use half the amount of cocoa powder. There’s no need to buy a whole jar for this recipe, unless of course you wanna try it! The drinks themselves are super yum and kids adore them, and I like to sprinkle the the powder on toast with some condensed milk!
  2. ½ tsp coffee granules will give a little extra depth of flavour, but if you actually want to taste the coffee, add 1 tsp. The measurement is for instant coffee granules like Nescafe, if using Starbucks Via you will probably need only half of a sachet.
  3. If you want to make a big batch, don’t scale up the water proportionally; add just enough water to cover the peanuts. Keep in mind that the more you make the longer it will take to evaporate all the liquid.

Instructions

  1. Spread the peanuts onto a plate and pick out any that look “unwell” (remember to replace them with healthy ones so you keep the proper amount). You can also rinse them gently in cold water if you like if you think they might be dirty.
  2. If your sesame seeds are not yet toasted, toast them in a dry pan over medium high heat, stirring constantly until golden. Remove and set aside.
  3. In a wok or a large pot (see note below re: choice of cookware) combine water, sugar, coconut milk, Ovaltine and instant coffee. Turn the heat on medium high and stir with a rubber spatula just until the sugar is dissolved.
  4. Once sugar is dissolved, add the peanuts and bring to a simmer. Turn heat to medium low to maintain a simmer, then keep cooking, stirring occasionally, until the syrup starts to thicken, about 10 minutes for this amount.
  5. Once the syrup looks thick, you want to be stirring all the time, scraping the bottom with the rubber spatula constantly. Keep the heat medium-low throughout.
  6. From this point onward, you have to really pay attention: Keep stirring until the sugar gets so thick that is starts to crystalize, and it will look at first like wet sand. Keep stirring, and eventually the sugar will look dry and powdery, and all the peanuts should be evenly coated in the sugar. DO NOT STOP STIRRING AT THIS STAGE. Sprinkle the salt on evenly over the peanuts and keep tossing.
  7. As you keep going, it will feel like nothing is happening for a bit, but then the sugar around the peanuts will start to melt again, and the peanuts will start to get wet spots. Once all of the peanuts have some wet spots on them, sprinkle on the sesame seeds as evenly as you can, and toss well to coat. DO NOT let the sugar liquefy too much; you want just SOME wet spots on all of the peanuts so the sesame seeds have something to stick on (see video for what this should look like).
  8. Once the nuts are well coated in sesame seeds, transfer onto a parchment or silicone-lined baking sheet to cool, spreading the peanuts apart so they don’t stick to each other.
  9. Let cool completely before eating. These can be stored in an airtight container for several weeks, but let’s face it, they will not last that long!

Notes

Choice of cookware: Choose something you can vigorously stir in without the peanuts jumping out. A deep, bowl-shaped wok like I use in the video is perfect since there are no corners, making it easy for you to scrape the sugar. A non-stick surface is also helpful as the sugar will not stick to it and makes it easier to scrape the sugar off the pan. If you don’t have a wok, an 8- or 10-inch pot will also work – just be diligent with scraping the corners. I chose not to use my seasoned carbon steel wok because I don’t want the oil I use to season the wok and the “wok flavour” to get into the nuts – though it’s probably okay to use it. 


Super addictive snacks that can be easily made in 20 minutes. Peanuts coated in crunchy candy and fragrant sesame seeds! #glutenfree #vegan #thaifood

Super addictive snacks that can be easily made in 20 minutes. Peanuts coated in crunchy candy and fragrant sesame seeds! #glutenfree #vegan #thaifood

The post “Can’t-Stop” Candied Peanuts appeared first on Hot Thai Kitchen.


  • Digg
  • Del.icio.us
  • StumbleUpon
  • Reddit
  • RSS

The BEST Waffles I’ve Ever Had!

Thanks to Skillshare for sponsoring this video! The first 1000 people who click this link will get 2 free months of Skillshare Premium.

What Makes a Great Waffle?

The best waffles, to me at least, have a crispy exterior and a tender, moist and fluffy interior, and a great flavour that’s good enough to enjoy even without any toppings. This recipe ticks all the boxes.

There are a few secrets, but most important of all, cornstarch. The cornstarch cuts down the amount of total gluten in the flour, making a super light and tender waffle. A good amount of oil keeps everything tender and crispy. And the perfect amount of sugar makes them just sweet enough so you’re not relying completely on toppings to make them tasty.

Waffles Done Ahead of Time

These can totally be prepped in advance, and there are even a couple of ways to do it:

  1. If you want to enjoy “fresh-off-the-iron waffles”, you can mix all the dry ingredients the night before and leave them covered in the mixing bowl. Mix all the wet ingredients in another bowl and keep it covered in the fridge. In the morning you first preheat the iron, and while it’s heating up mix the wet and dry ingredients together. This way you’ll have waffles on the table in less than 15 minutes! I would not make all the batter in advance as batter with baking soda needs to be cooked shortly after mixing.
  2. If you want to have them within 5 minutes of getting up, make the waffles and freeze them. To reheat, microwave them for about 15-20 second just until they’re no longer frozen. Then pop them in the toaster or toaster oven until they’re hot throughout and crispy!

Waffle Iron

For this you want to use a Belgian waffle iron. This is the one I use and it’s great. Makes 4 slices at a time, which means you only have to cook the waffles in 2 batches, and it has been working for us for over 10 years!

Print
A secret ingredient makes these super crispy on the outside and moist and fluffy on the inside. They're so easy and freeze well! #waffles #breakfastrecipe

The BEST Waffles I’ve Ever Had!

  • Author: Pailin Chongchitnant
  • Yield: 8 waffles

Description

Thanks to Skillshare for sponsoring this video! The first 1000 people who click this link will get 2 free months of Skillshare Premium: https://skl.sh/pailinskitchen


Ingredients

  • 225 g all-purpose flour, this is about 1½ cups (see notes on variations below)
  • 60 grams cornstarch (you can also use regular rice flour)
  • ½ tsp salt
  • ½ tsp baking soda
  • 1 tsp baking powder
  • 1 cup plain yogurt (or use 1 ½ cups buttermilk and reduce the milk to only ½ cup)
  • 1 cup milk
  • ¾ cup vegetable oil (I use avocado oil)
  • 2 eggs
  • 2 tsp vanilla extract
  • 3 Tbsp sugar
  • Toppings of your choice: I like butter, yogurt, maple syrup and berries. Craig likes peanut butter, yogurt and jam/syrup on his 🙂

Variations: You can use whole wheat flour if you want to make it healthier, and it works just fine in this recipe. I have also tried substituting ½ cup of the flour with cornmeal which gave it a nice texture. 


Instructions

  1. If you have to finish the whole batch before eating (as opposed to eating as soon as they are done), preheat your oven to the lowest temp (around 150°F) so you can keep your waffles warm and crispy while you finish.
  2. In a large mixing bowl, whisk all the dry ingredients together: flour, cornstarch, salt, baking powder, baking soda. *If your baking powder/soda is clumpy, make sure you sift it or break up the lumps with your fingers.
  3. In a small mixing bowl beat the eggs with a whisk, then add oil, yogurt, milk, vanilla and sugar; whisk everything until well combined. Tip: Use a 1 cup measuring cup to measure the oil first (you can eyeball ¾ cup if there aren’t any graduated lines), then when you go to measure the yogurt, the oil-coated cup will help the yogurt slide right out with ease!
  4. Make a well in the dry ingredients and pour the wet ingedients into it. Whisk everything just until combined, little tiny lumps are okay. Don’t overmix.
  5. Preheat your waffle iron while preparing a cooling rack to put the waffles on once they’re done.
  6. Fill the waffle iron, making sure the corners are filled, but also don’t over fill. For my waffle iron I use about 1/3 cup of batter each. Cook them until golden (on my iron I use darkness level 3 out of 5, but this could depend on your iron).
  7. Keep the finished waffles on a rack so they don’t go soggy from condensation, and keep them in the low oven while you finish the rest.

A secret ingredient makes these super crispy on the outside and moist and fluffy on the inside. They're so easy and freeze well! #waffles #breakfastrecipe

The post The BEST Waffles I’ve Ever Had! appeared first on Hot Thai Kitchen.


  • Digg
  • Del.icio.us
  • StumbleUpon
  • Reddit
  • RSS

Panang Curry Beef – Lockdown Special (Never Too Small Collab)

About Panang Curry

This recipe is a special collaboration with Never Too Small, and it has been slightly modified for lockdown. You can find the original recipe here.

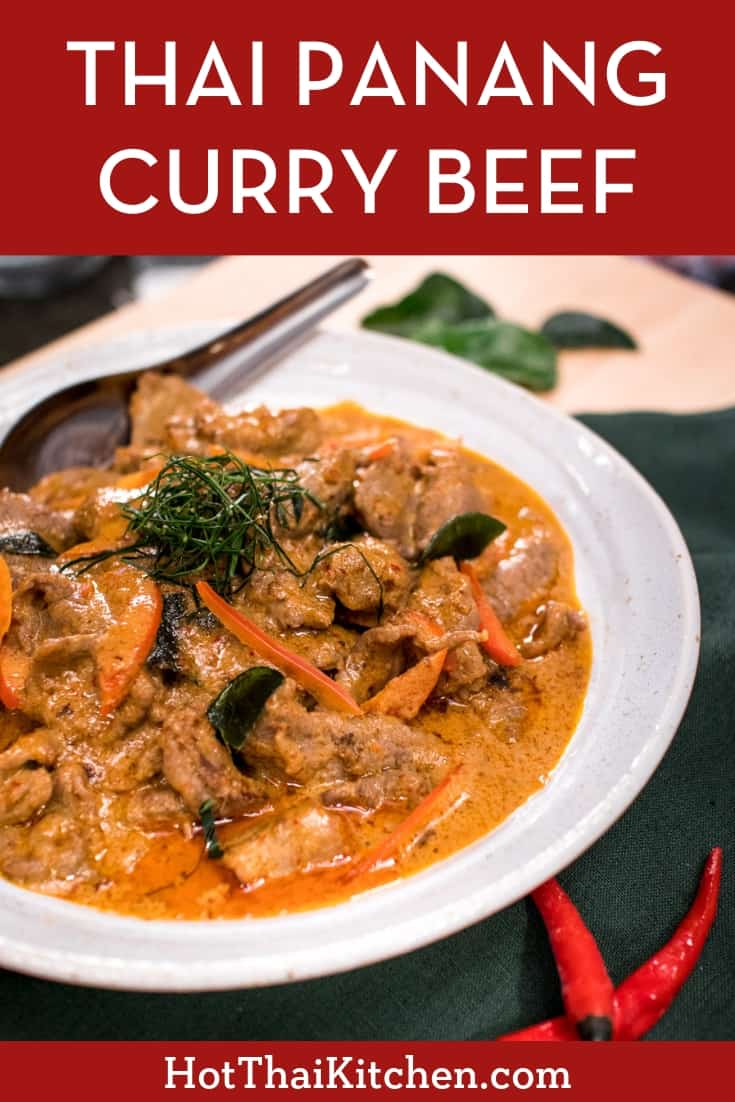
Panang is a classic, much loved Thai curry that is very quick and simple to cook, which is why it’s perfect one for lockdown! Instead of being soupy like most other Thai curries, this one is more of a saucy curry with a thick, rich, luscious, flavourful sauce.

Panang Curry Paste

You can sometimes find pre-made panang curry paste, but it isn’t always available. However, Thai red curry paste is very easy to find, and with that, we can make our own panang paste! Take the red curry paste and add three simple ingredients: cumin, coriander seeds, and peanuts. Typically we use ground roasted peanuts, but for lockdown, a little peanut butter will do the trick.

Substituting Beef

This recipe calls for beef, but you can substitute any protein you have in the fridge! To make it vegan, you can us sturdy roasted vegetables such as eggplant, butternut squash, or portobello mushrooms. You can also substitute firm tofu as well!

Print
Panang is a popular classic Thai curry with a rich and luscious peanut sauce over tender beef that is super quick to make. I also share how to make semi-homemade panang curry paste using store-bought red curry paste as a base. An easy, delicious, gluten-free weeknight meal! #panangcurry #thaicurry #hotthaikitchen #Thairecipe #beefcurry

Thai Panang Curry – Lockdown Special

  • Author: Pailin Chongchitnant

Ingredients

  • 300g beef, very thinly sliced against the grain
  • 1½ tsp fish sauce
  • 2 tsp oil
  • ¾ cup + ½ cup coconut milk
  • 1 recipe homemade or semi-homemade panang curry paste (recipe follows)
  • 10 kaffir lime leaves, 7 roughly torn, 3 finely julienned (see note)
  • ~1 tsp fish sauce, to taste
  • 1 Tbsp brown sugar
  • A handful of julienned red bell pepper for garnish, optional
  • Jasmine rice for serving

Semi-Homemade Panang Curry Paste

  • 34 Tbsp red curry paste
  • ¾ tsp toasted cumin seeds, ground
  • 1½ tsp toasted coriander seeds, ground
  • 2 tsp smooth peanut butter

Note: You can find kaffir lime leaves, fresh, frozen or dried. But if you can’t get to the store and don’t have any, don’t worry about it. You can try adding Thai basil instead as well. 


Instructions

  1. For the curry paste, simply mix together red curry paste, cumin, coriander, and peanut butter
  2. For the meat, add the fish sauce and oil and mix it together well. The oil will help the beef separate more easily when you go to cook it.
  3. In a wok or saute pan, bring 3/4 cup of the coconut milk to a boil and let it reduce until it’s thick and creamy. We’re gonna use this fatty coconut milk to saute our curry paste.
  4. Add the curry paste, and keep stirring for a few minutes until it gets really thick and aromatic.
  5. Add brown sugar, the roughly tear in the kaffir lime leaves then cook it for a minute or so. 
  6. Add the beef and toss it with the curry paste. You want to separate the pieces quite quickly so they will cook evenly. 
  7. Once the beef is about half way cooked, add the rest of the coconut milk and stir just until the beef is fully cooked.
  8. If you want you can add some red bell peppers for some colour, and then take it off the heat.
  9. At this point if it looks too dry and you want something a little more saucy, you can just add a splash of water. And because some brands of curry pastes are saltier than others, you want to give it a taste before you finish, and if it needs more salt, you can add a splash of fish sauce.
  10. You can garnish with some julienned kaffir lime leaves if you have some, then serve it with some hot Thai jasmine rice.

Panang is a popular classic Thai curry with a rich and luscious peanut sauce over tender beef that is super quick to make. I also share how to make semi-homemade panang curry paste using store-bought red curry paste as a base. An easy, delicious, gluten-free weeknight meal! #panangcurry #thaicurry #hotthaikitchen #Thairecipe #beefcurry

The post Panang Curry Beef – Lockdown Special (Never Too Small Collab) appeared first on Hot Thai Kitchen.


  • Digg
  • Del.icio.us
  • StumbleUpon
  • Reddit
  • RSS

Coffee with Me LIVE Q&A!

Thanks everyone for joining our live Q&A! To be notified when I will have the next livestream, please make sure to subscribe to the YouTube channel, and/or follow me on Facebook, Twitter or Instagram!


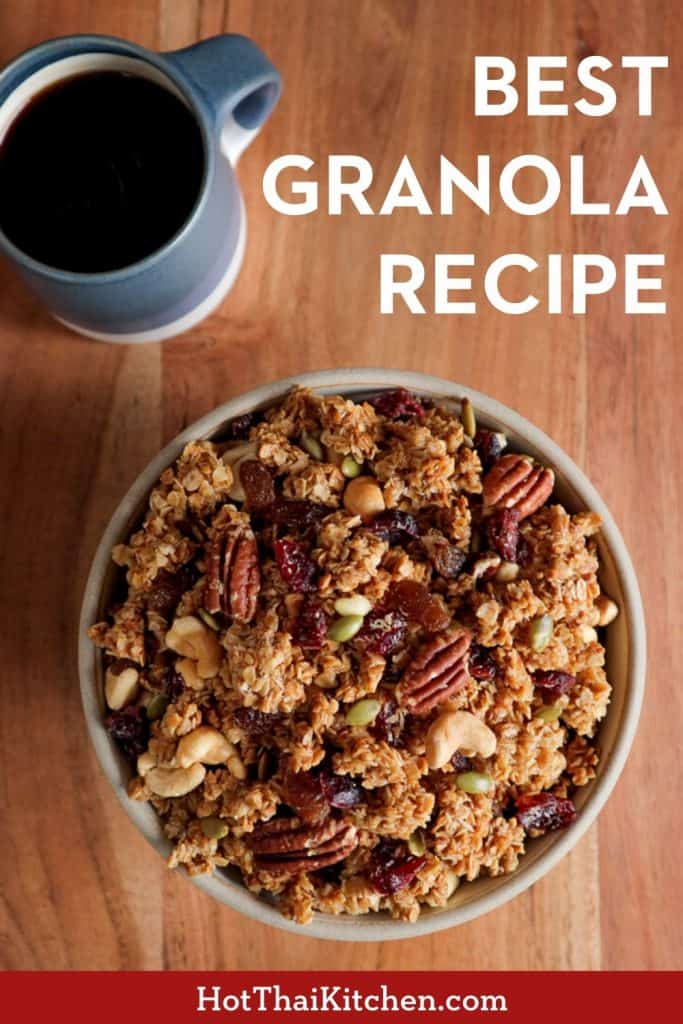
My BEST granola recipe I've been making for years! Perfect during lockdown, or any time! #granola #lockdownrecipe

The post Coffee with Me LIVE Q&A! appeared first on Hot Thai Kitchen.


  • Digg
  • Del.icio.us
  • StumbleUpon
  • Reddit
  • RSS

Lockdown LIVE Q&A!

Thanks everyone for joining our live Q&A! To be notified when I will have the next livestream, please make sure to subscribe to the YouTube channel, and/or follow me on Facebook, Twitter or Instagram!


My BEST granola recipe I've been making for years! Perfect during lockdown, or any time! #granola #lockdownrecipe

The post Lockdown LIVE Q&A! appeared first on Hot Thai Kitchen.


  • Digg
  • Del.icio.us
  • StumbleUpon
  • Reddit
  • RSS