
Chocolate ganache is the ultimate secret weapon for all things sweet because it’s dead easy to make, incredibly versatile and adds a luxurious touch to anything it graces. Spread on cakes as chocolate ganache frosting, pour over sundaes, make fancy drips, or roll it to make truffles!
What is Chocolate Ganache?
If you’re new to chocolate ganache and wondering what chocolate ganache actually is, this is going to be a life changing moment for you!
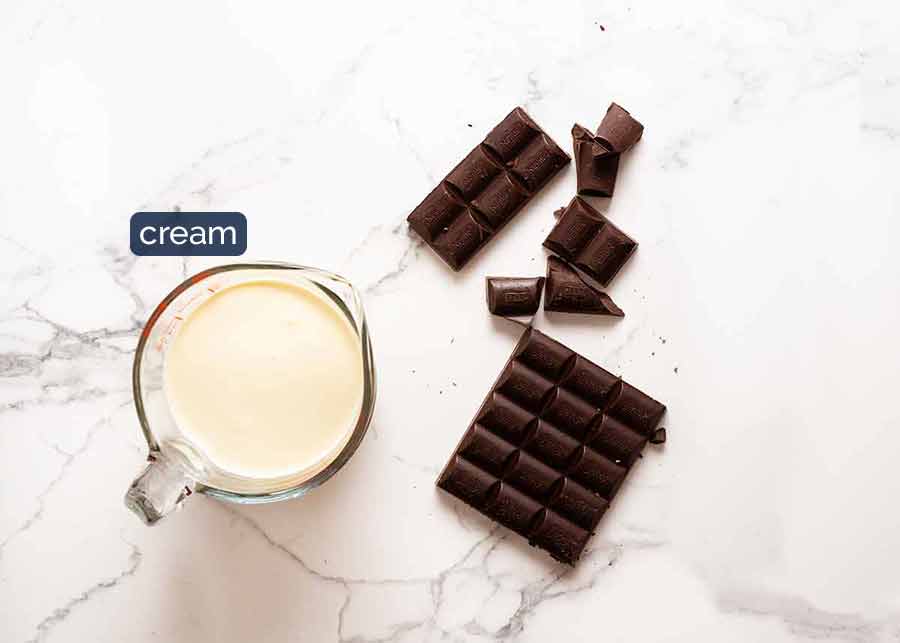
Made with just cream and any chocolate you want (dark, milk or white), chocolate ganache is a rich chocolate concoction that can be used as a sauce, frosting, glaze, filling or for dipping.
When it’s warm, it’s pourable. When it’s cool, it’s spreadable. And when it’s cold, it’s rollable.
And when you eat it, in any of those forms, it’s heavenly. It literally melts in your mouth!
What to do with Chocolate Ganache
This amazing chocolate magic has a seriously impressive list of things it can be used for! Here are just a few examples:
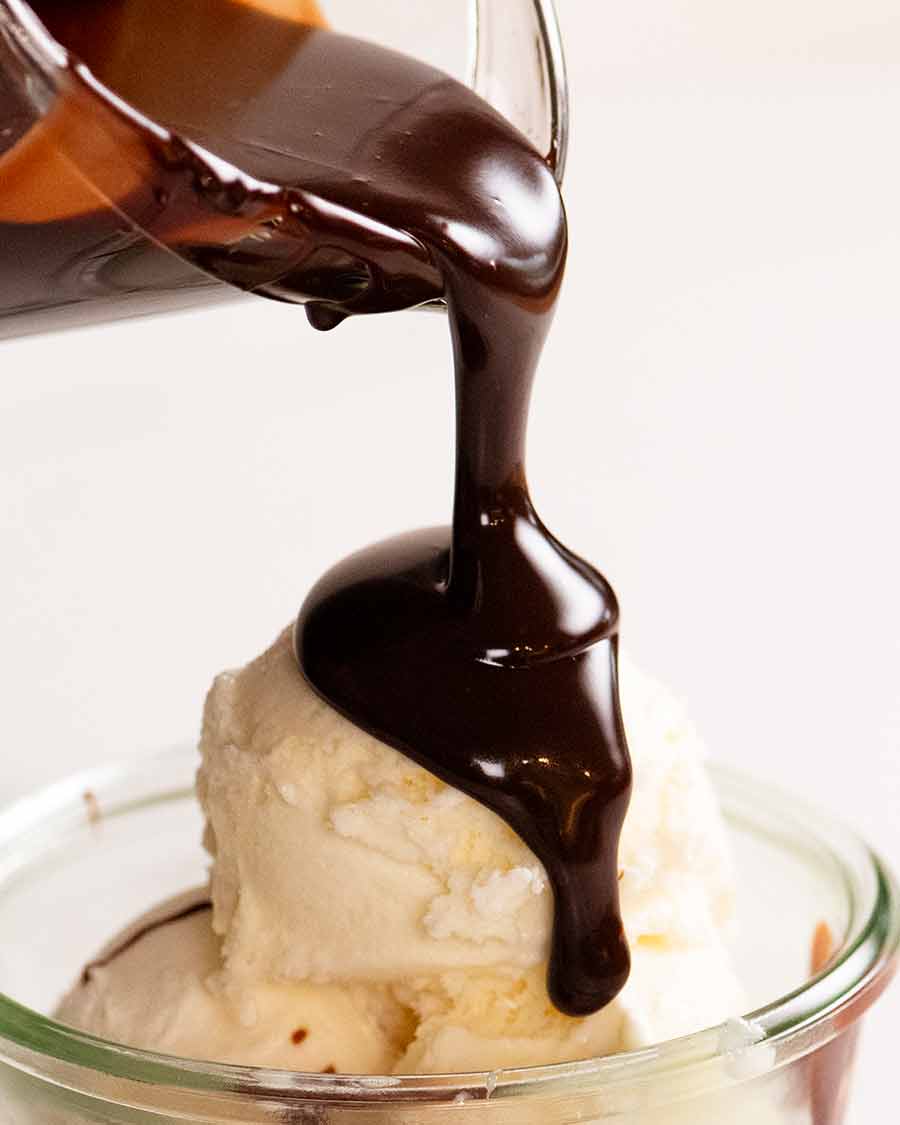
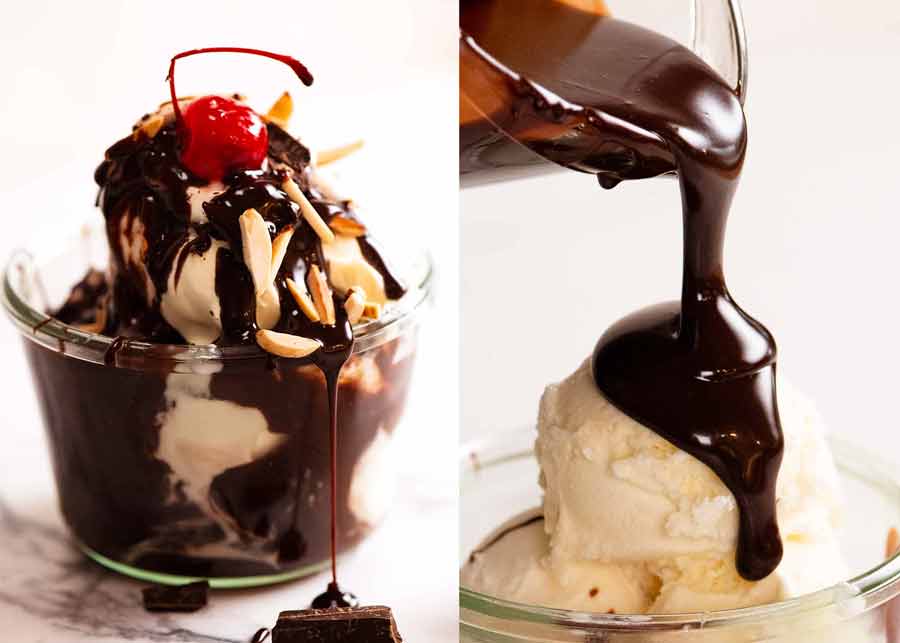
- A Hot Fudge Sauce for pouring over towering ice cream Sundaes;
- A dipping sauce for things like Churros;
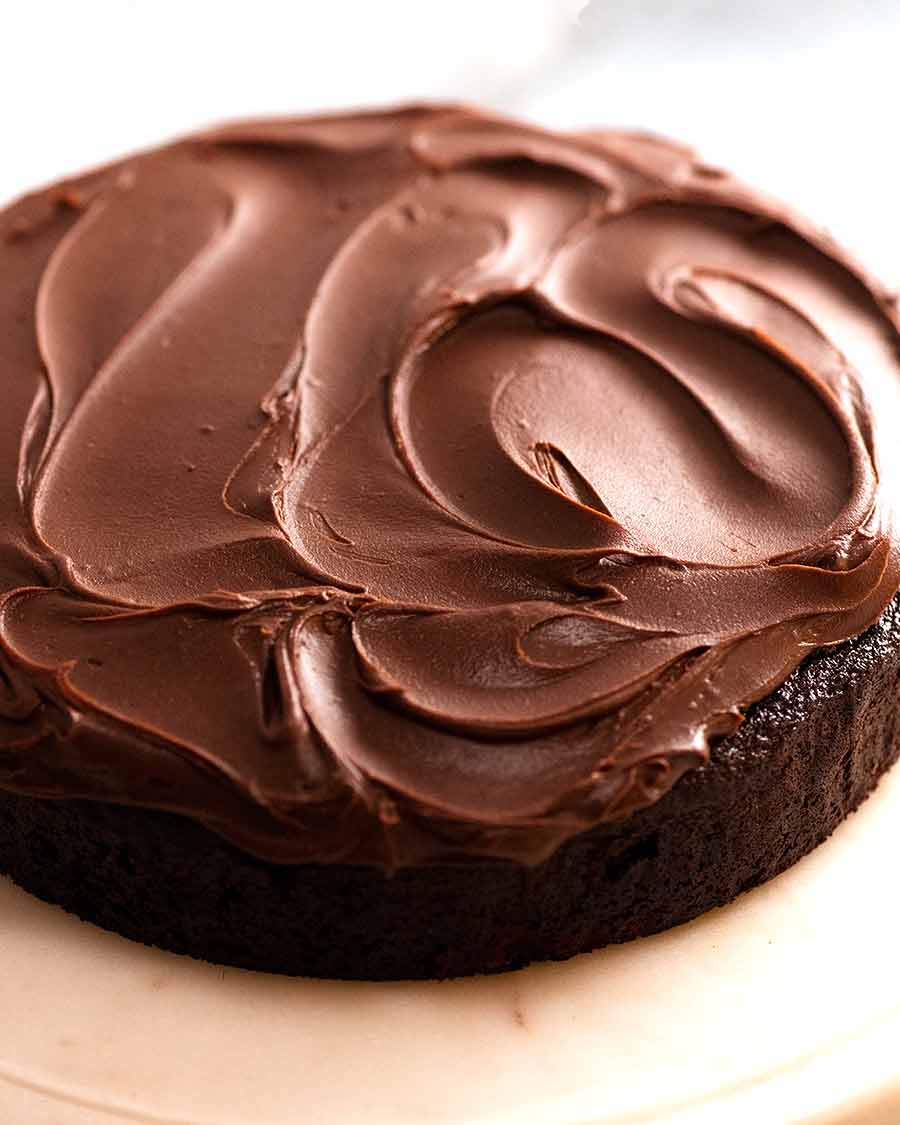
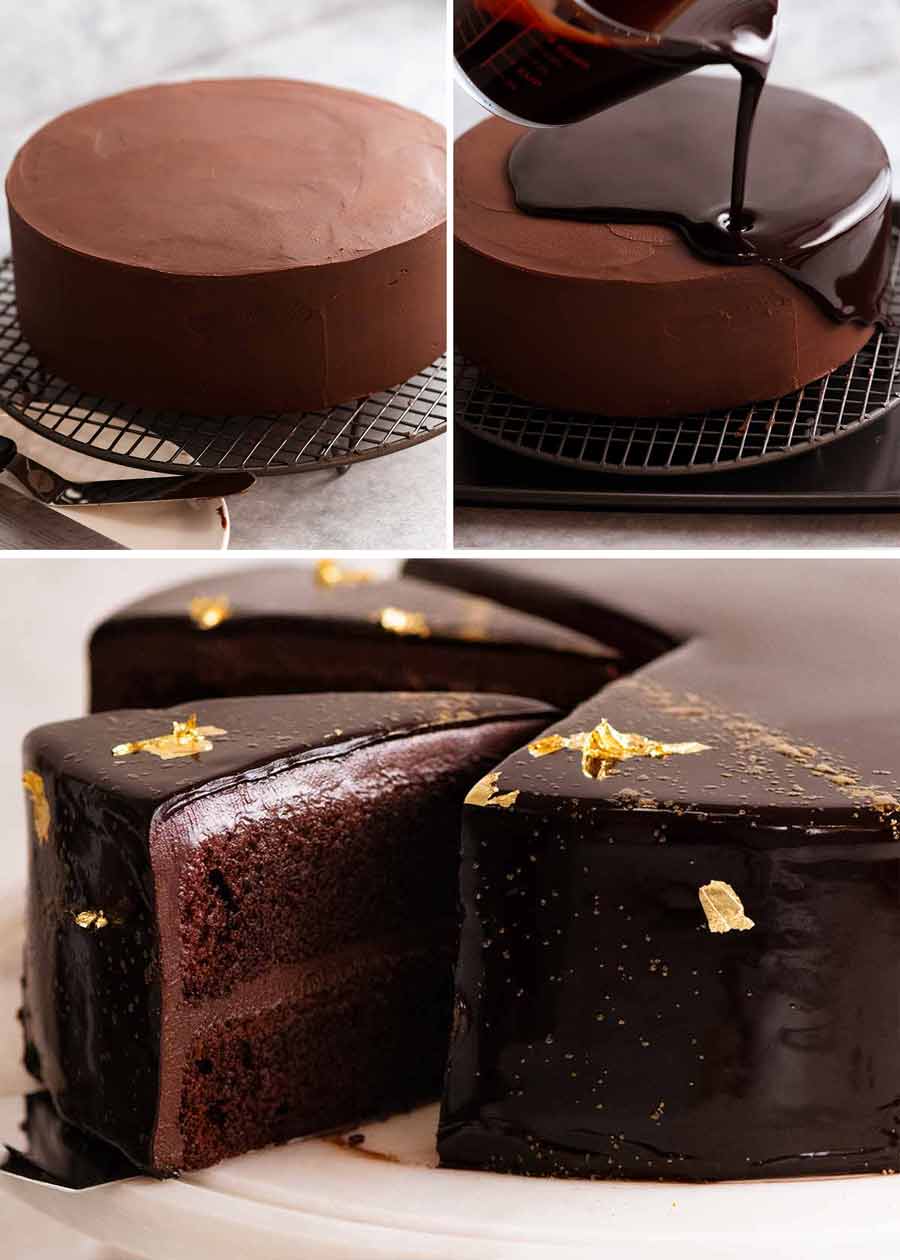
- The ultimate luxurious chocolate frosting to spread onto cakes and cupcakes – such as in this Chocolate Ganache Fudge Cake;
- As a filling between cake layers;
- As a perfectly smooth frosting base for a Chocolate Mirror Glaze;
- A drippy-style glaze or drizzling over things;
- Whip it to make whipped ganache so it’s airier and less rich, so you can pipe it sky high onto cupcakes;
- As a filling or topping for pastries and tarts (like this Salted Caramel Chocolate Tart);
- For piping decorations; and
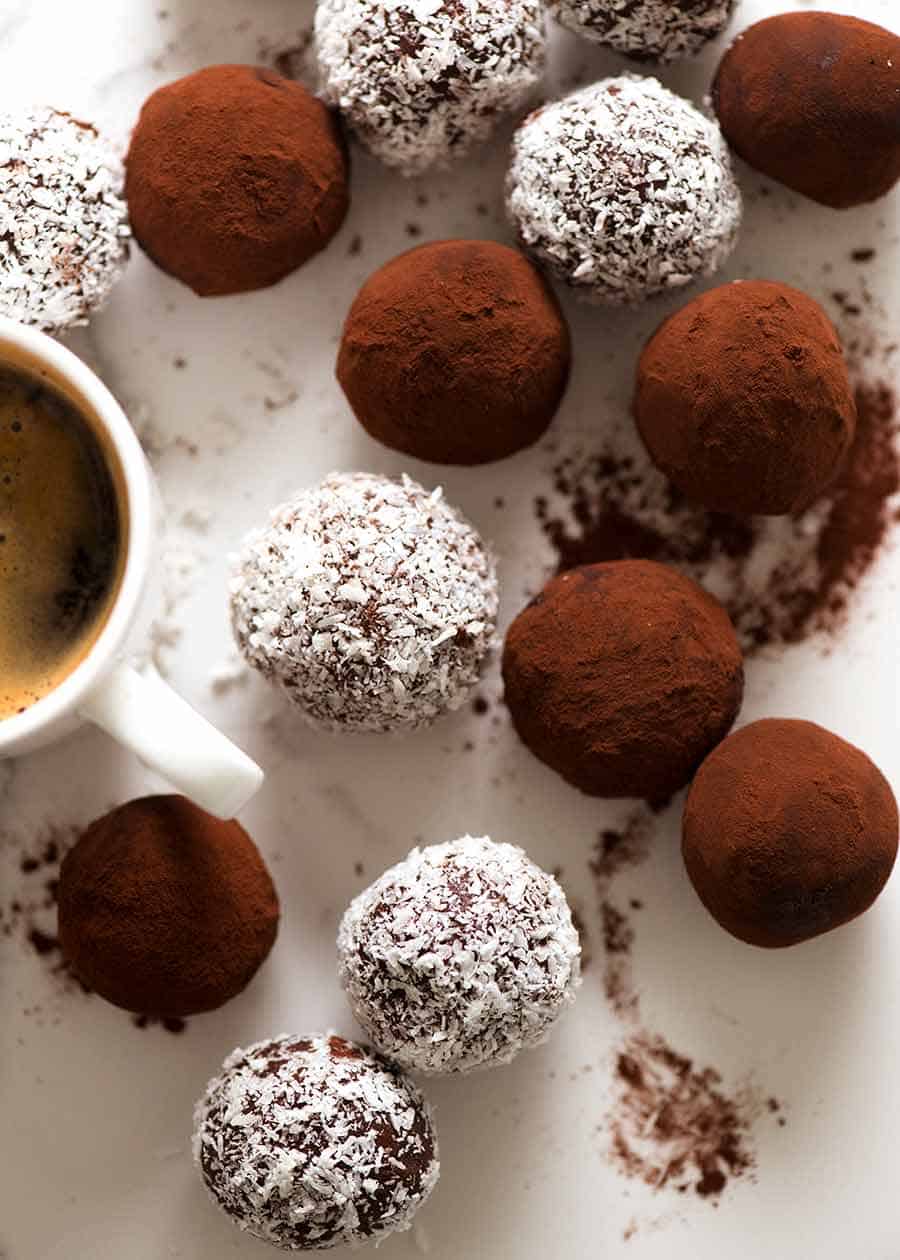
- Rolling into balls to make truffles.
I mean, look at that list. I did not exaggerate when I said it can literally be used for anything!

What goes in Chocolate Ganache
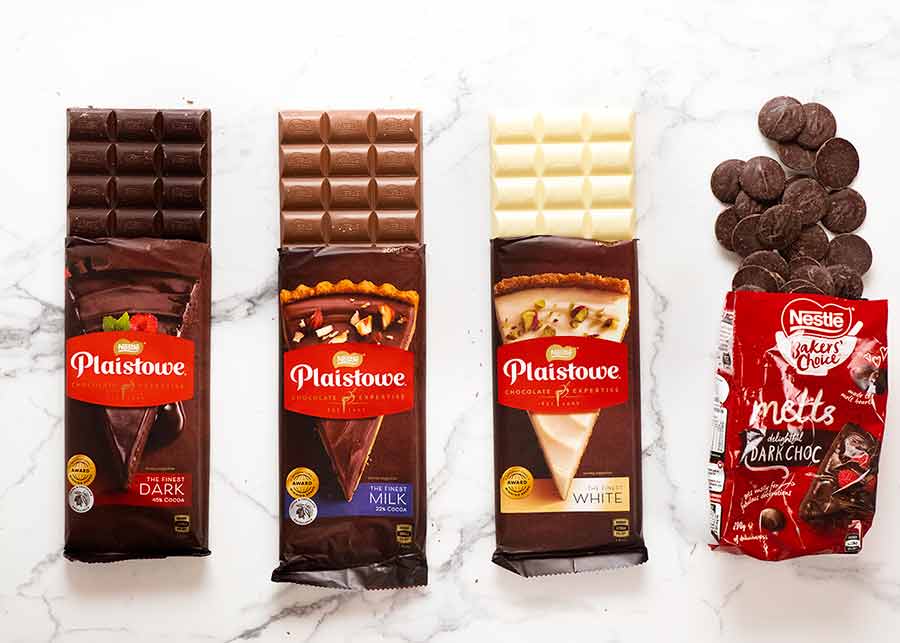
All you need is chocolate and cream to make chocolate ganache. You can use any of the three types of chocolate your heart desires – dark, milk or white chocolate. But there are some important rules of thumb to follow for the best results.
Best chocolate for Chocolate Ganache
- Cooking chocolate – You must use cooking chocolate sold in the baking aisle, not eating chocolate. Cooking chocolate is made so it melts smoothly. Eating chocolate simply does not melt properly – it ends up grainy and lumpy;
- White, milk or dark/semi-sweet can be used;
- Blocks that you chop up yourself melt better and more smoothly than chocolate chips or melts sold in packets. Chips and melts do work – but might need a quick extra zap in the microwave to ensure the ganache melts fully;
- Quality – An obvious one: The better the quality of chocolate, the better the ganache. I use Plaistowe brand blocks which are sold at everyday grocery stores in Australia; and
- My chocolate of choice – My personal favourite is called dark chocolate here in Australia and most of the world, but is also known as semi-sweet in the US. It’s typically between 40 – 50% cocoa and will yield a rich chocolate flavour. It is still sweet but not as sweet as milk chocolate. It also has a more luxurious texture than milk or white chocolate.
Avoid bittersweet chocolate or any chocolate > 60% cocoa
I personally don’t recommend using any chocolate that is more than 60% cocoa. It’s not sweet enough, not creamy enough and the cocoa flavour is too intense for this purpose unless you add glucose or sugar, which this recipe does not cater for because it is just a simple chocolate ganache recipe.
Best cream for Chocolate Ganache
- Heavy / thickened cream, pure cream, whipping cream and heavy whipping cream can be used;
- 30% fat or greater cream must be used (the above creams all are). If it’s less than 30% fat, the ganache won’t become firm once cooled, it will be too runny; and
- No low fat cream or cream alternatives I typically offer in other recipes (such as evaporated milk or half and half) will work for chocolate ganache unless you change the quantity of liquid to chocolate so the chocolate thickens.
How much cream to use in Chocolate Ganache
The amount of cream required will vary depending on which chocolate you use because dark chocolate is firmer than white chocolate. So we use more cream for dark chocolate and less for white chocolate to achieve the same ganache consistency:
| Chocolate type | Choc to cream ratio | Measures |
|---|---|---|
| Dark chocolate / semi-sweet chocolate |
1:1 | 250g / 8 oz chocolate; 250g / 8 oz / 1 cup cream |
| Milk chocolate | 3:1 | 250g / 8 oz chocolate; 85ml / 2.6oz / 1/3 cup cream |
| White chocolate | 4:1 | 250g / 8 oz chocolate; 65ml / 2oz / 1/4 cup cream |
Note: The above table is to demonstrate the chocolate-to-cream ratios only. In the recipes, I have standardised the amount of ganache the recipe makes using any of the above three chocolates. So you won’t see 250g/8oz chocolate for all three recipes, only for the dark chocolate one which I consider to be the baseline recipe.
How to make Chocolate Ganache
And here’s how to make chocolate ganache (spoiler: it’s dead easy and totally effortless)!
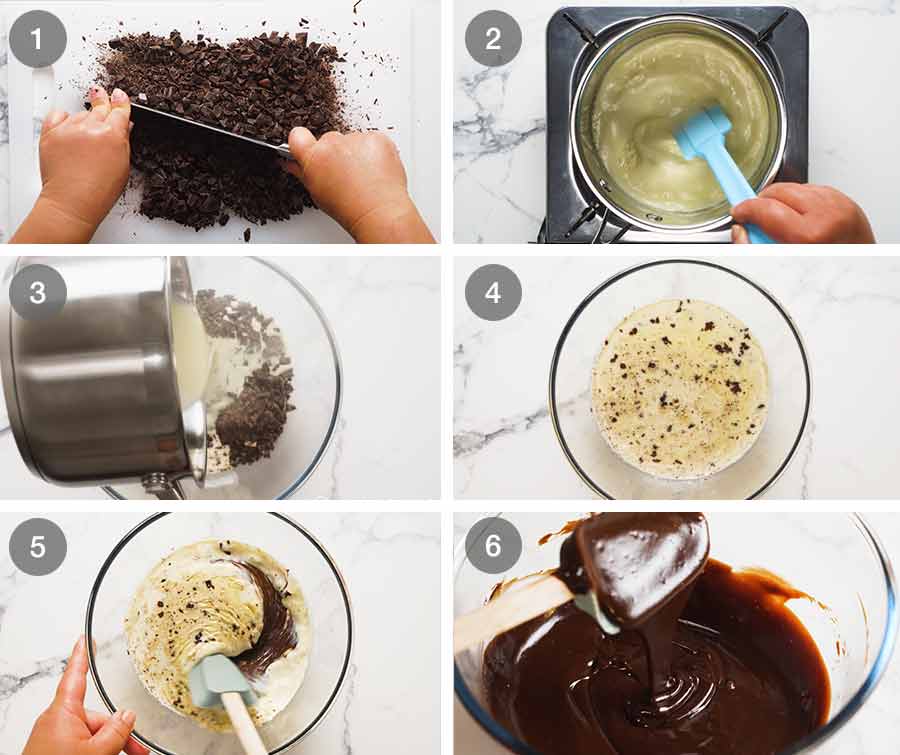
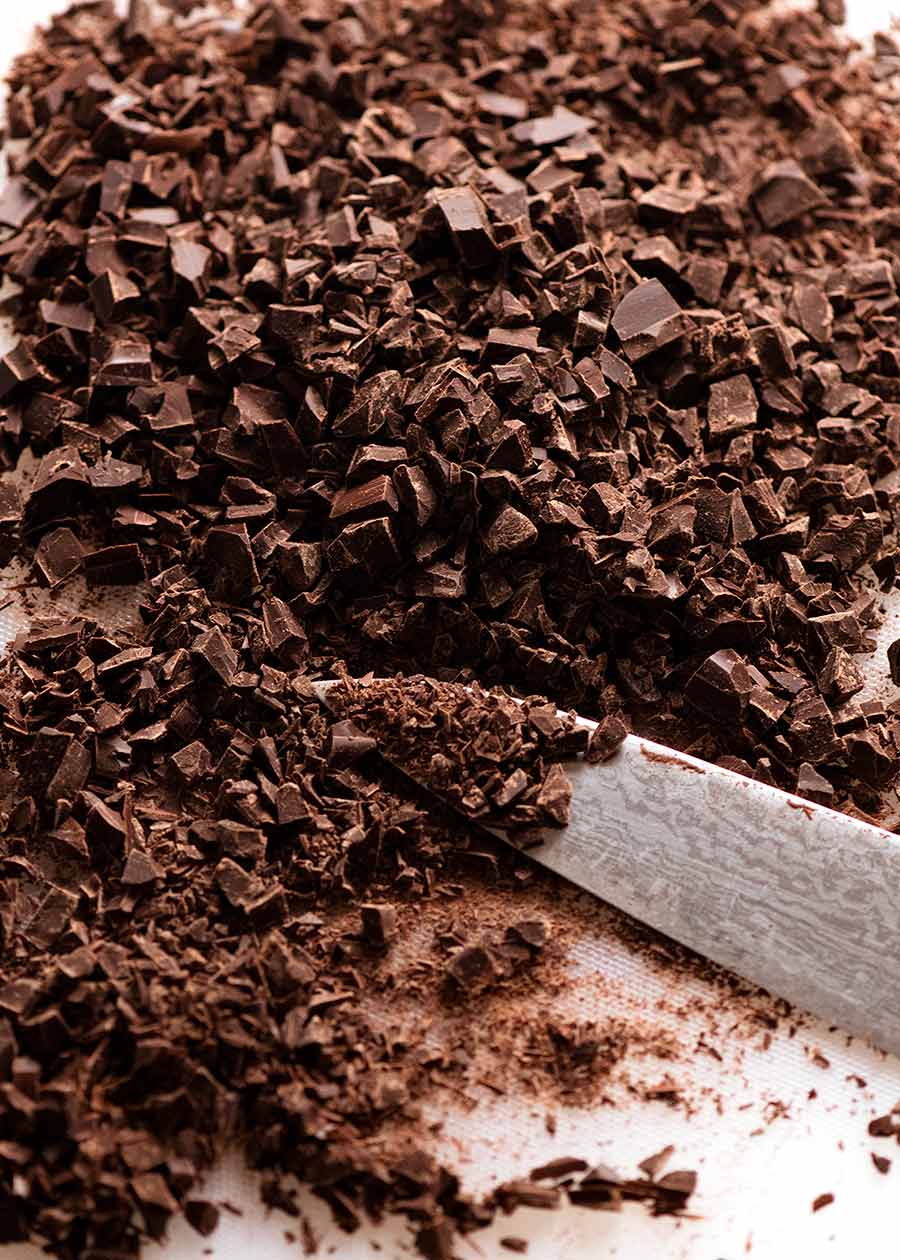
- Chop chocolate into small pieces. The smaller the better, to guarantee a smooth melt;
- Heat cream on the stove or in a microwave until hot and steamy but DO NOT let it boil. If it boils, it is too hot and may split the chocolate. If your cream gets too hot, set aside to cool then reheat;
- Pour hot cream over chocolate in a heatproof bowl. Poke/push chocolate under the cream as best you can. You can easily do this for dark chocolate ganache because there’s enough cream, but with the milk chocolate and white ganache, there isn’t enough cream to fully cover it;
- Stand 10 minutes uncovered. Why uncovered? Because if you cover it, condensation drips into the chocolate and might cause it to split*. I found this out the hard way!
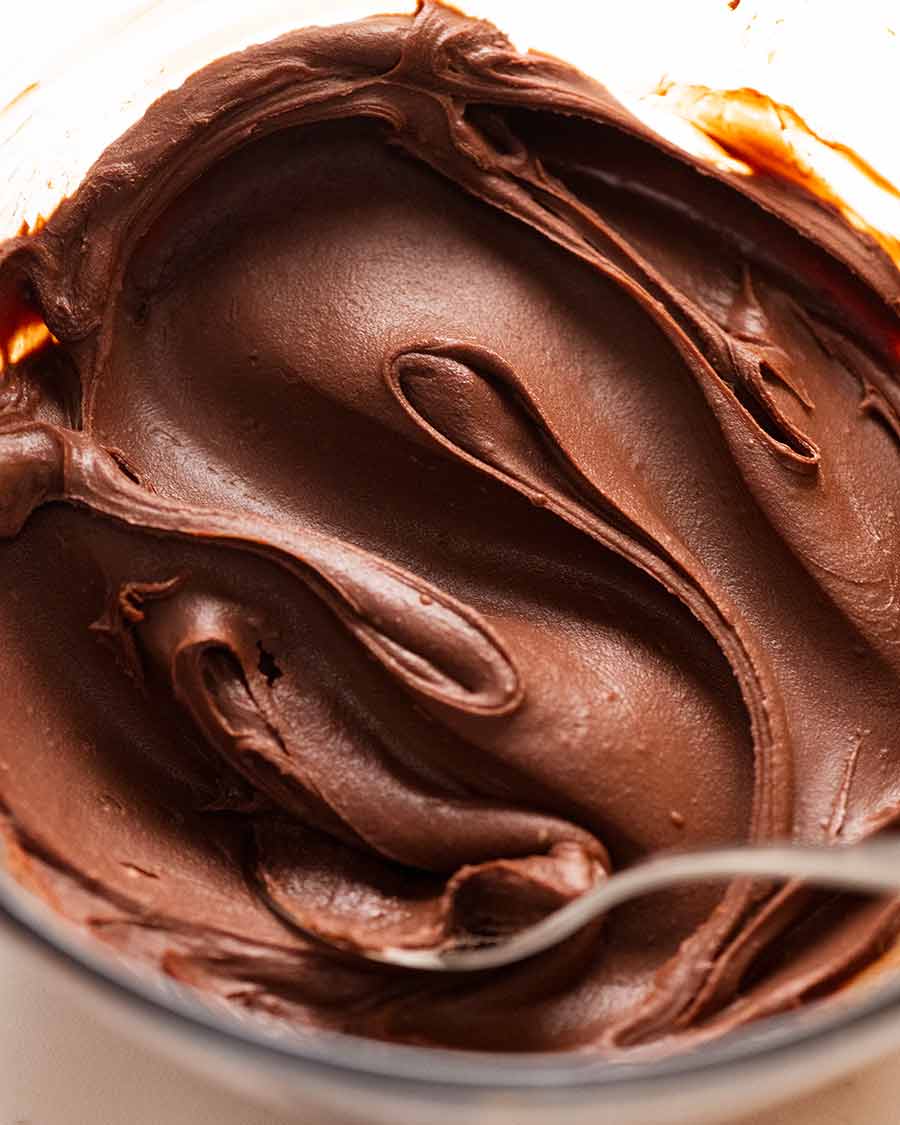
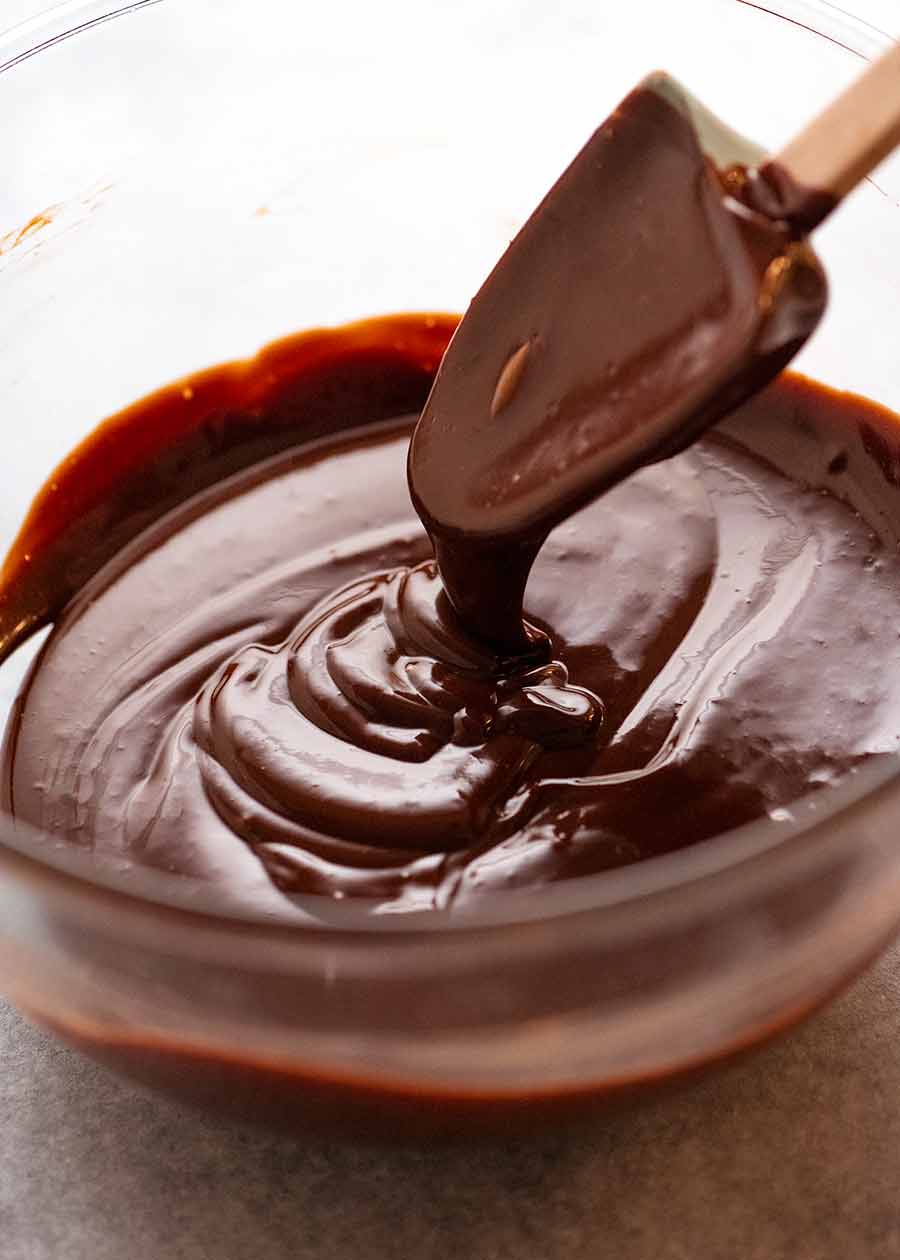
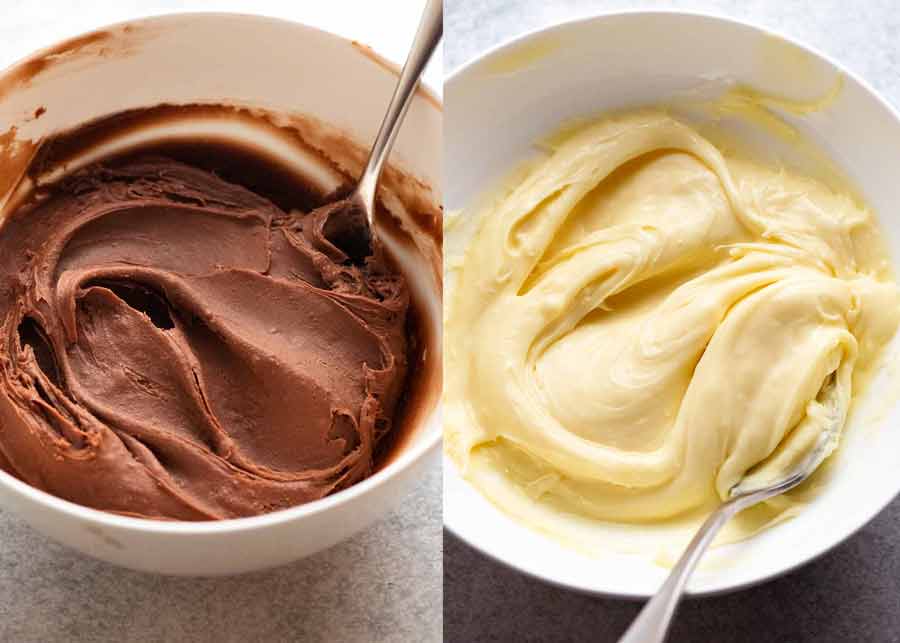
- Mix to combine the cream and chocolate until it becomes a smooth and glossy chocolate sauce. At first, it may seem like it won’t combine – just keep mixing, it will happen! Also don’t use a whisk – it aerates the mixture too much and you end up with bubbles in the ganache. If this happens, it will fix itself when the ganache thickens as it cools, but if you’re using it as a pouring glaze, it’s not ideal;
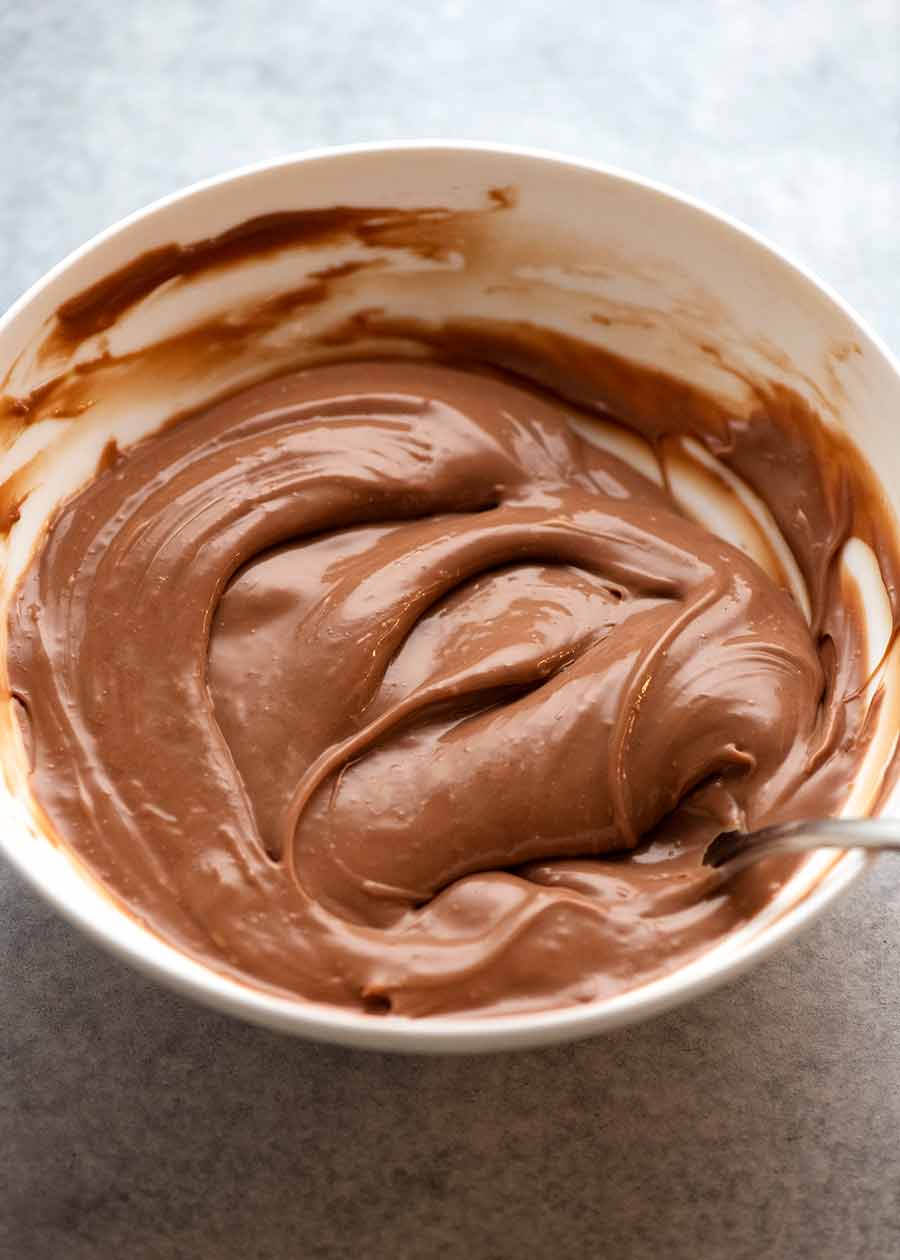
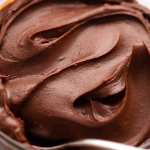
- Marvel at the shiny river of chocolate ganache you’ve just made! Now it’s just about getting the right consistency for its intended purpose. On to the next section!
*Note: Most everyday baking chocolates are made to be more stable so they shouldn’t split even if you accidentally get a bit of water in it. But typically, the more expensive the chocolate, the more prone to splitting it is! So it’s better to be safe than sorry. 
And here’s a photo of the milk chocolate and white chocolate ganache after they have cooled down and thickened.
Different consistencies for different applications
Immediately after you’ve made it, ganache will be runny and warm. To make it thicker, you just need to cool it down. The cooler it gets, the thicker it gets. If you refrigerate overnight, it gets so thick you can roll it to make truffles!
- Warm and runny – use as a dipping sauce or hot fudge sauce to pour over ice cream, or anything!
- Cooler but still runny – a thicker runny consistency, this is perfect for pouring over cakes to get a smooth thick finish, creating drips down the side of cakes, or spreading onto cupcakes so you get a nice smooth frosting;
- Cooled to room temperature – it will thicken to a soft, peanut butter consistency, making it perfect to use as a filling in cakes, and frosting the sides and top. It will look like buttercream. It can even be used for decorative piping around the edge of cakes. You could do big swirls on cupcakes – but I think you’ll find it’s too rich for that. It’s better to whip it first for that purpose – see below for Whipped Chocolate Ganache.

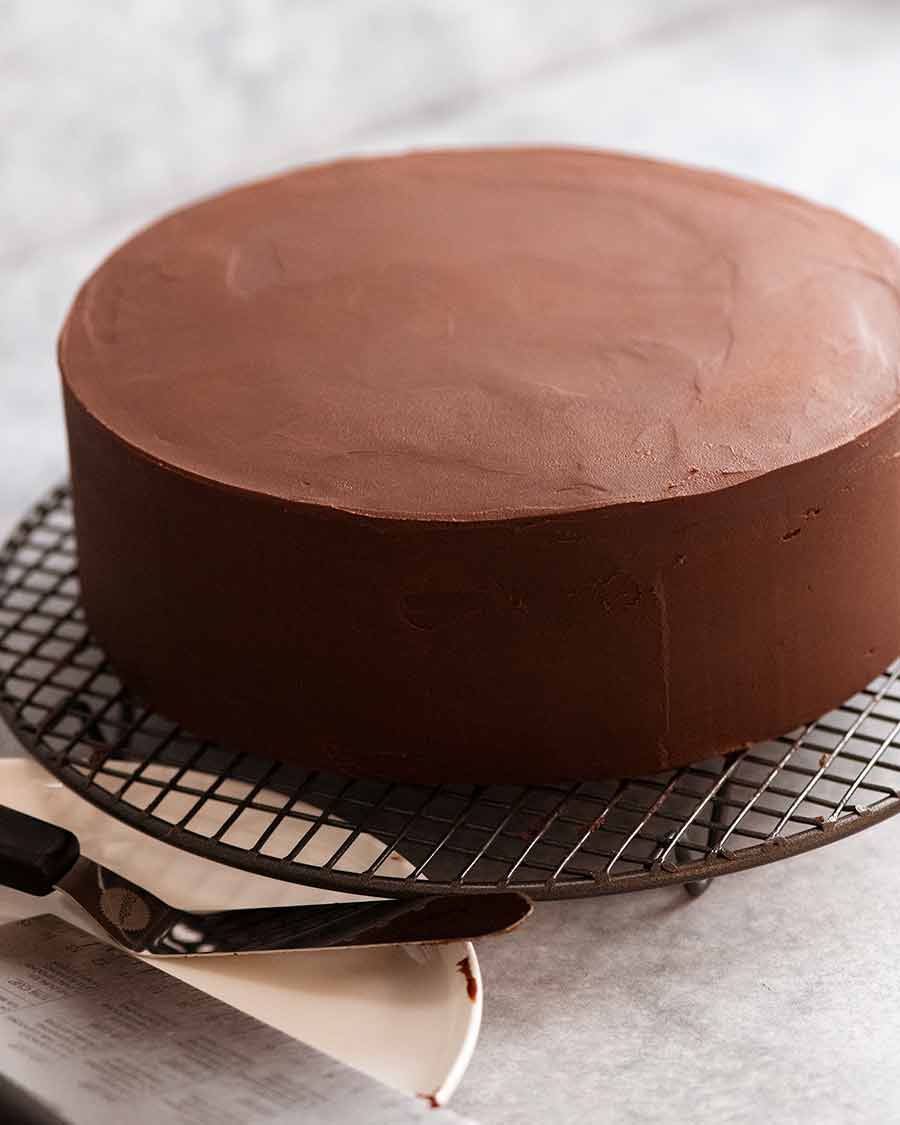
- Cool out of fridge but still malleable – this is a good temperature for spreading onto cakes when you want a super smooth surface because it’s easier to work with to make it smooth. You may want a smooth coating if that’s specifically the look you are after, or because you need an immaculately smooth base for a Mirror Glaze, as pictured below. It’s just easier to work with when it’s that little bit firmer like this.
- Firmly cold out of fridge – after an overnight chill, it will be so firm you can scoop it up and roll balls to make truffles!
Whipped Ganache
This is a good way to make ganache fluffier so it tastes less rich and dense, making it suitable for piping onto cupcakes and spreading generously over cakes as you would with Chocolate Buttercream.
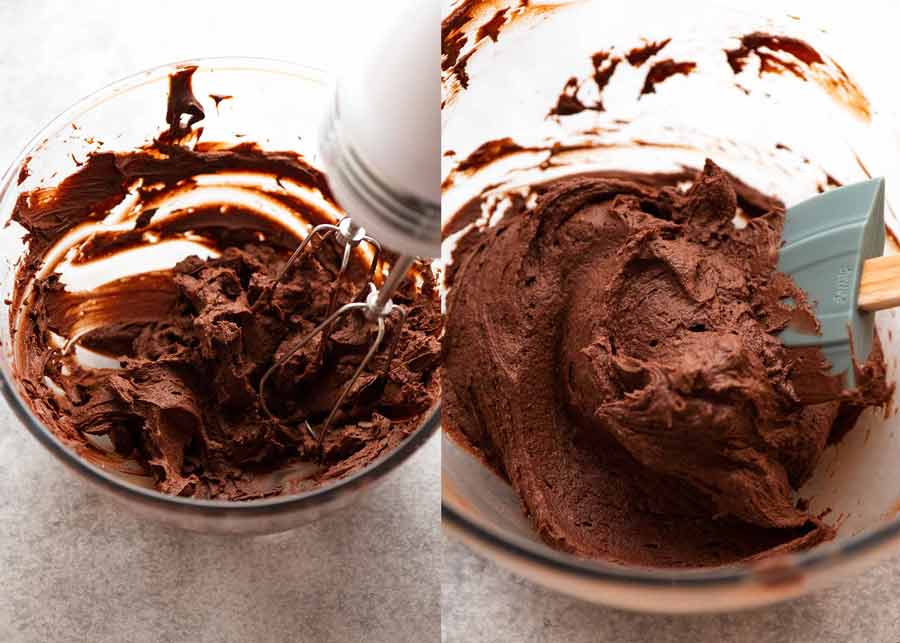
To make whipped chocolate ganache, place a bowl and the whisk attachment of your beater or stand mixer into the fridge to chill. The reason for this is to keep the ganache cool while whipping (the whipping generates friction, which in turns warms the ganache – bad!).
Place ganache into your chilled bowl and whip it like cream. It will lighten in colour and increase in volume. Then just use as you would chocolate buttercream – pipe or frost onto cakes and cupcakes!
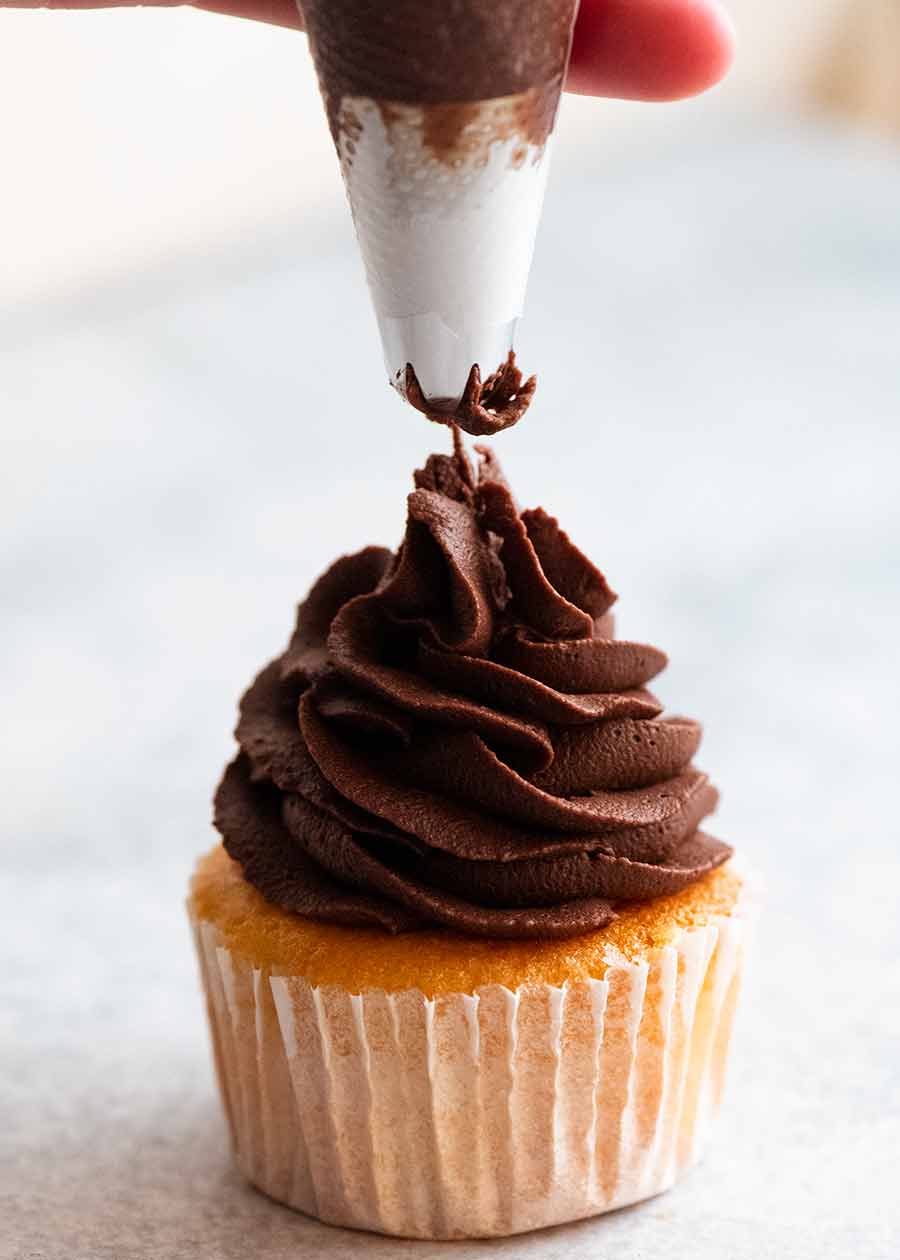
Note however, while whipped ganache can be piped, it is not as stable as Chocolate Buttercream. Depending on the quality of the chocolate you used, the piped frosting might split and look untidy. In truth is generally better used for spreading rather than piping.
Spreading Chocolate Ganache so it’s smooth
There are various reasons why you might want a perfectly smooth Chocolate Ganache frosting on a cake. You might desire a pristinely smooth cake surface for your cake decoration, or you require a perfectly even base for a flawless Mirror Glaze.
To learn my tips, see this separate post: How to get a Smooth Frosting or Ganache Finish on Cakes.
Chocolate Ganache Tips & Troubleshooting
Ganache is one of those things that are fundamentally really easy but have a few pitfalls that can catch you out. Here are my tips and tricks to help you sidestep or solve them!
- Cream too hot – chocolate is a fickle thing and it really hates liquids that are too hot. It will make this phobia known to you by splitting or seizing or becoming grainy. To avoid this, heat the cream up gently to just before a boil, when it’s nice and steamy and starting to simmer, but not boiling rapidly. If your cream starts boiling, let it cool down fully then start again;
- Lumpy ganache – if your ganache is lumpy due to chocolate bits that aren’t fully melted (what do you mean, you didn’t chop it finely enough??
 ), this is not a big deal. Just pop it in the microwave for 20 seconds on high, stir for a while, repeat as necessary until smooth;
 - Grainy ganache – this is different to when chocolate bits didn’t fully melt. It’s occurred because the cream was too hot. But fear not, it’s fixable: Try 20 seconds in the microwave followed by a mix, repeating as necessary. If after 3 attempts it is still grainy, use an immersion blender/blender stick – this will force it into smooth submission!;
- Split ganache – when you see streaks of oil, this means the ganache has split. This happens because either the cream was too hot, OR you somehow got water into the mixture (eg. bowl wasn’t dry). But this too is fixable. Heat up 2 tablespoons of milk until warm (NOT boiling!) then whisk in 1 teaspoon at a time (using a handheld whisk) until it comes together. Don’t add too much otherwise the ganache will become too thin;
- Ganache is too thin – after cooling, if it’s too thin for intended purpose, then melt the ganache in 30 second increments in the microwave. Melt some more chocolate separately and whisk it in until smooth. Cool and re-use;
- Ganache is too thick – thin by whisking in warmed cream. I am very cautious and use 1 teaspoon at a time – because it is a pain if you make it too runny then you have to thicken it!
- Speed up cooling process – transfer into a small shallow tray, cover with cling wrap but so it’s not touching the surface. Always cool to room temperature first, then refrigerate once fully cool (otherwise condensation will form and the water might split your ganache); and
- Ganache is not practical for super-hot weather – ganache is best consumed at room temperature for the best eating experience, so it melts in your mouth. It’s just not as nice eating cold chocolate! Because of this, it’s not practical to make ganache if it’s super hot where you are – say 30°C/85°C or warmer – because it will just melt before it comes to room temperature after storing in the fridge.
Below is what ganache looks like when it’s too warm. It doesn’t hold its shape, it kind of oozes – albeit slowly. It’s also sticky and doesn’t crust over like glazes. Not very suitable for frosting cakes.
How to store chocolate ganache
- Room temperature for 3 days – up to 23°C/73°C or so, inside. Chocolate ganache is, after all, chocolate, so it will melt in hot temperatures. So refrigerate it if it’s warmer than that;
- Fridge – a week or the expiry date of the cream you used – whichever is shorter;
- Freezer – three months or so.
How to freeze and thaw chocolate ganache
Place fully cooled chocolate ganache in an airtight container and smooth the surface as best you can. Then cover with cling wrap, pressing down so it covers the surface. Place in freezer for up to 3 months (probably even longer ok!).
To thaw, leave overnight in the fridge. Dab off all condensation from the surface with a paper towel before mixing. If it splits, fix it using the warmed milk method I described above in the troubleshooting section.
And with that, I have said my piece! Who knew there was so much in my head that I had to share about a simple Chocolate Ganache! It really is a fabulous secret weapon to have up your sleeve that you can use to instantly make virtually any dessert ultra-luxe! – Nagi x
Watch how to make it
Chocolate Ganache
Ingredients
Dark Chocolate Ganache:
- 250g/ 8oz dark chocolate or semi-sweet chocolate block (up to 50% cocoa, Note 1)
- 1 cup thickened / heavy cream , pure cream or whipping cream (Note 2)
Milk Chocolate Ganache:
- 375g/ 12 oz milk chocolate block (Note 3)
- 1/2 cup thickened / heavy cream , pure cream or whipping cream (Note 2)
White Chocolate Ganache:
- 400g / 14 oz white chocolate block (Note 4)
- 1/3 cup + 1 tbsp thickened / heavy cream , pure cream or whipping cream (Note 2)
Chocolate Truffles:
- See Chocolate Truffles recipe (less cream for firmer ganache)
Instructions
Chop chocolate:
-
Using a sharp knife or serrated knife, finely chop the chocolate. Then scrape it all into a heatproof bowl – including all those little powdery shards!
Milk & White Chocolate Only:
-
Soften chocolate: Microwave in two 30 second bursts, stirring in between, to give the chocolate a head start melting. It doesn't need to fully melt, only soften. (Note 5)
Make Ganache:
-
Heat cream: Place cream in a small saucepan over heat or in a heatproof jug to microwave. Heat until hot and steaming but DO NOT let it boil – it might cause the chocolate to split or go grainy. (Note 6)
-
Pour cream over chocolate: Pour hot cream over chocolate, then spread chocolate out so it's as evenly covered by cream as possible. Cream will not fully cover white or milk chocolate, that's OK.
-
Wait 10 minutes: Leave for 10 minutes. Do not cover (Note 7).
-
Stir until smooth: Using a rubber spatula or spoon, stir until cream and chocolate are incorporated and it's silky smooth. (Note 8 about lumps)
-
Troubleshooting: If your ganache splits (ie. oil streaks) or is grainy, or it's too thick or thin, see above in post for how to fix these problems.
-
Cooling: If cooling your ganache (to spread, pipe or whip), cool it uncovered for 30 minutes. Then cover with cling wrap and press so it contacts the surface (so you don't get a skin forming) and continue to cool.
How to use:
-
Pourable / dipping sauce / pour glaze – allow to cool for 15 minutes on the counter until it's still runny but pourable. Use as required – pour over cakes as a thick chocolate glaze, over sundaes, into bowls to use for dipping, or to make drip decorations.
-
Spreadable frosting – cool to a spreadable peanut butter consistency. Cool 30 minutes on the counter then EITHER 4 hours in the fridge, stirring every now and then for even cooling, OR refrigerate overnight and then leave to soften on counter for 15 – 20 minutes.
-
Whipped Ganache – Place bowl and whisk attachment in fridge for 20 minutes. Place ganache in bowl then whip on high for 2 minutes until it changes to a pale brown colour and it's fluffier. Smear or pipe onto cakes and cupcakes.
-
Truffles – cool overnight in the fridge until firm. Use this Chocolate Truffles recipe.
Notes
- The lighter the chocolate (ie. white vs milk vs dark) the softer it is, so the less cream you need.
- You MUST use cooking chocolate, ie. chocolate purchased from the baking aisle, NOT regular eating chocolate (it doesn’t melt properly).
- For troubleshooting tips and “gotchas”, see in post.
1. Dark chocolate – called “semi-sweet chocolate” in the US, this has a great, rich dark chocolate flavour with enough sweetness to make a perfect ganache frosting or for truffles. It’s less sweet than milk and white chocolate.
- Quality – The better the chocolate, the better the ganache. Plaistowe in Australia is the best you can get at everyday stores. Cadbury blocks are a near second. In the US, Ghiradelli is an excellent option – I stock up when I visit!
- Cocoa % – Anything up to 50% cocoa is great. If it’s higher then 60% cocoa (like 70% cocoa – called “bittersweet chocolate”), it is not sweet enough to use for ganache unless you add glucose or sugar (which is a different recipe).
- Melts or chips intended for melting work fine too, but blocks tend to be better quality. Plus you’re able to chop them finer than chips, so melt better for a smoother ganache.
- Dark chocolate ganache is the most common ganache you see in patisseries and used for fancy cake decorations. I also like it best for its flavour and texture. It is the most luxurious and creamy.
Nutrition
Life of Dozer
Just can’t take him seriously in his Counting Sheep PJs….. (But highly practical for holding in all that sand in his fur!)

The post Chocolate Ganache appeared first on RecipeTin Eats.


0 comments:
Post a Comment