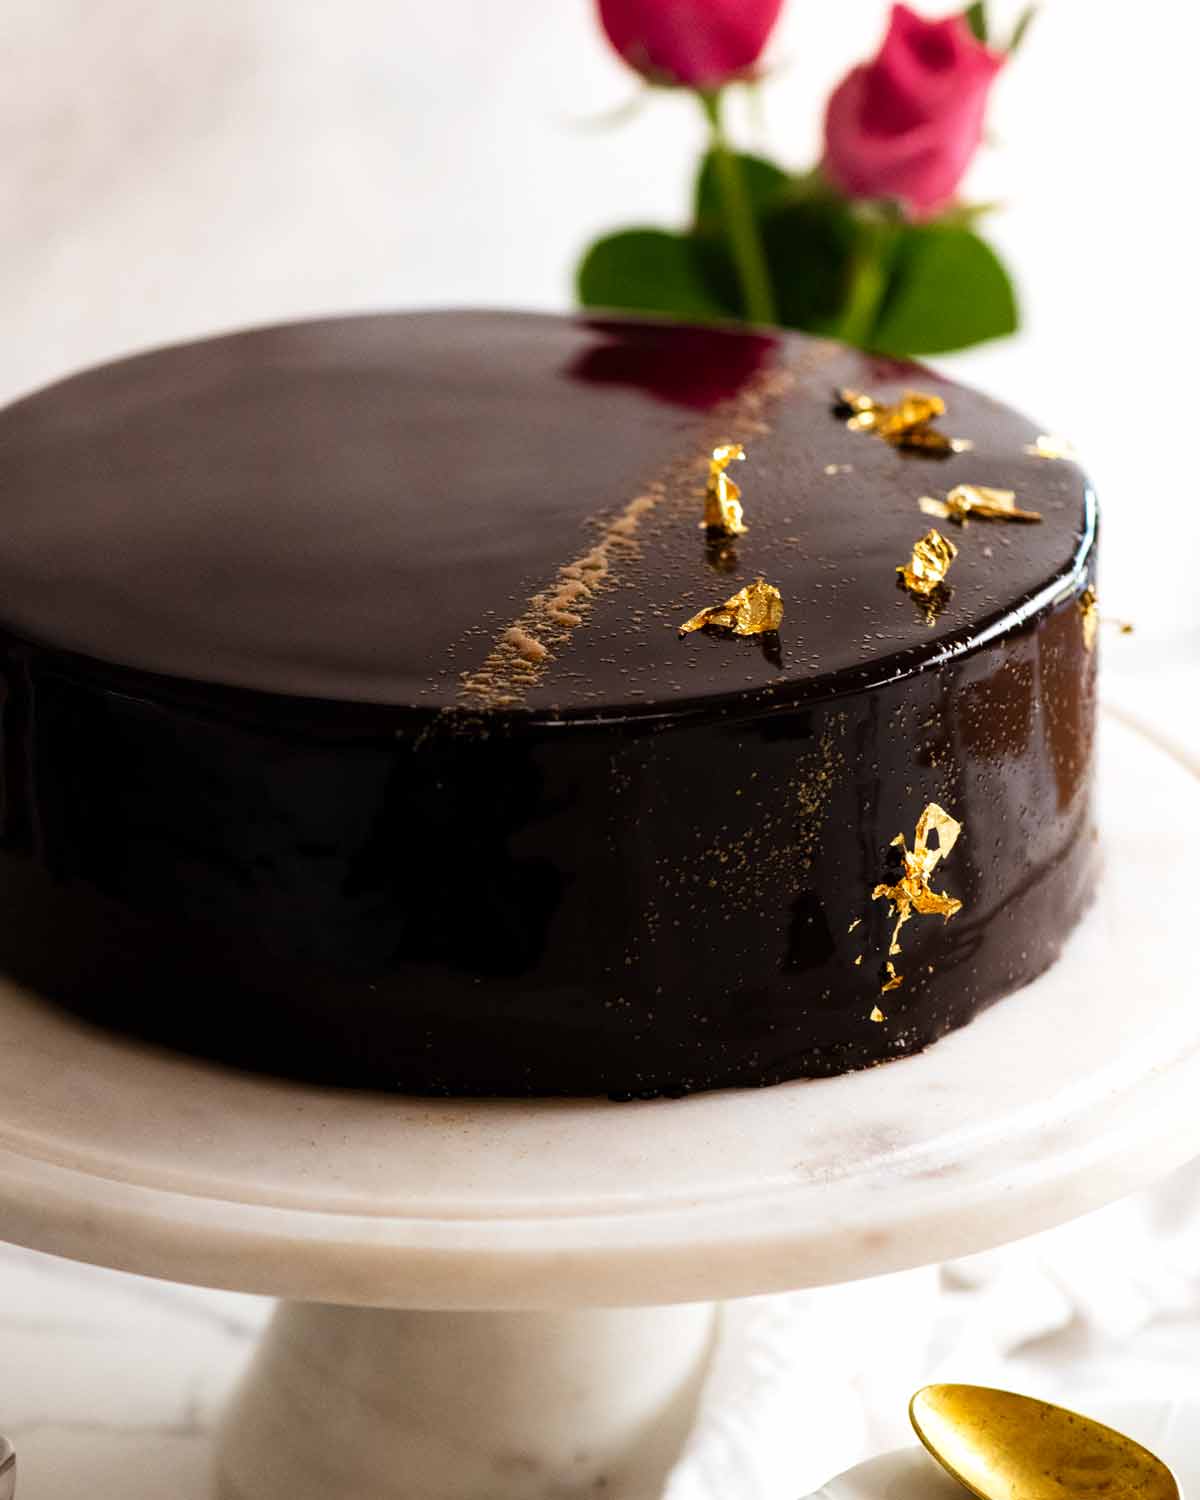
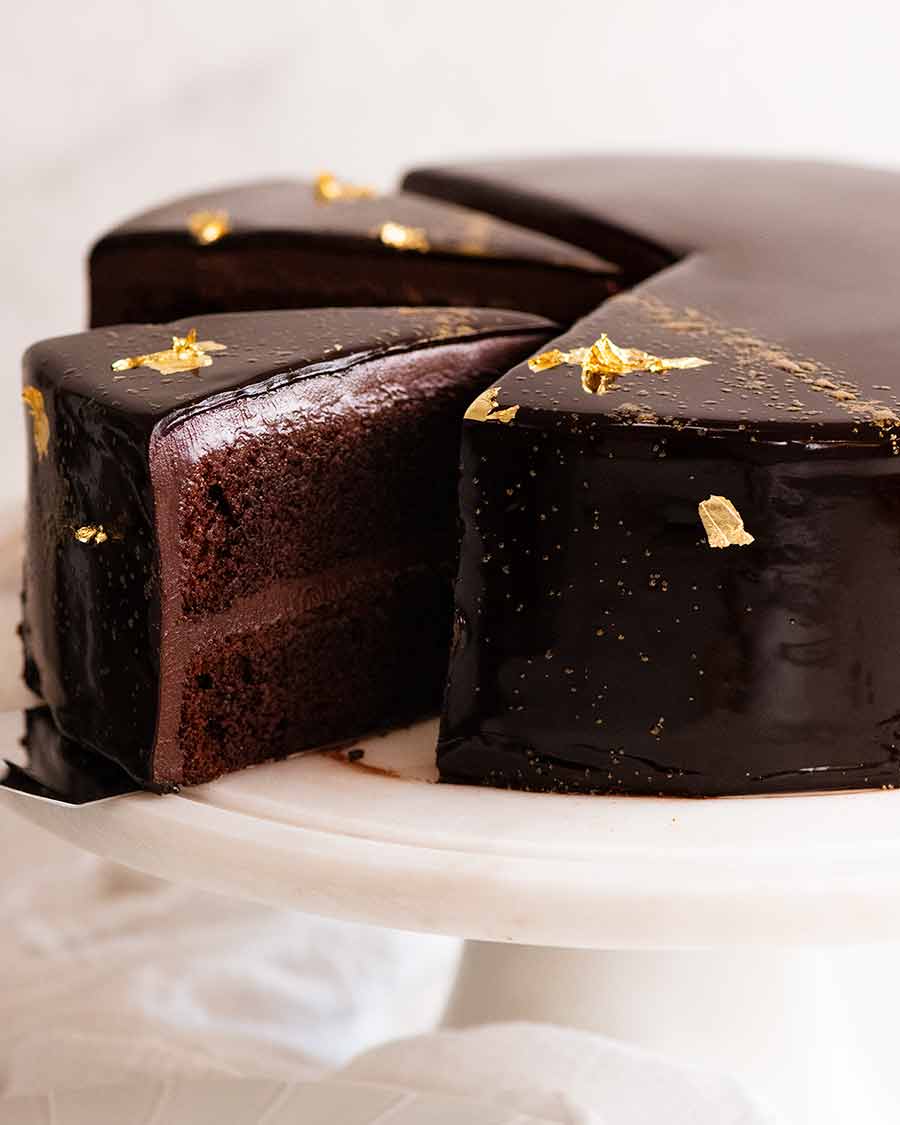
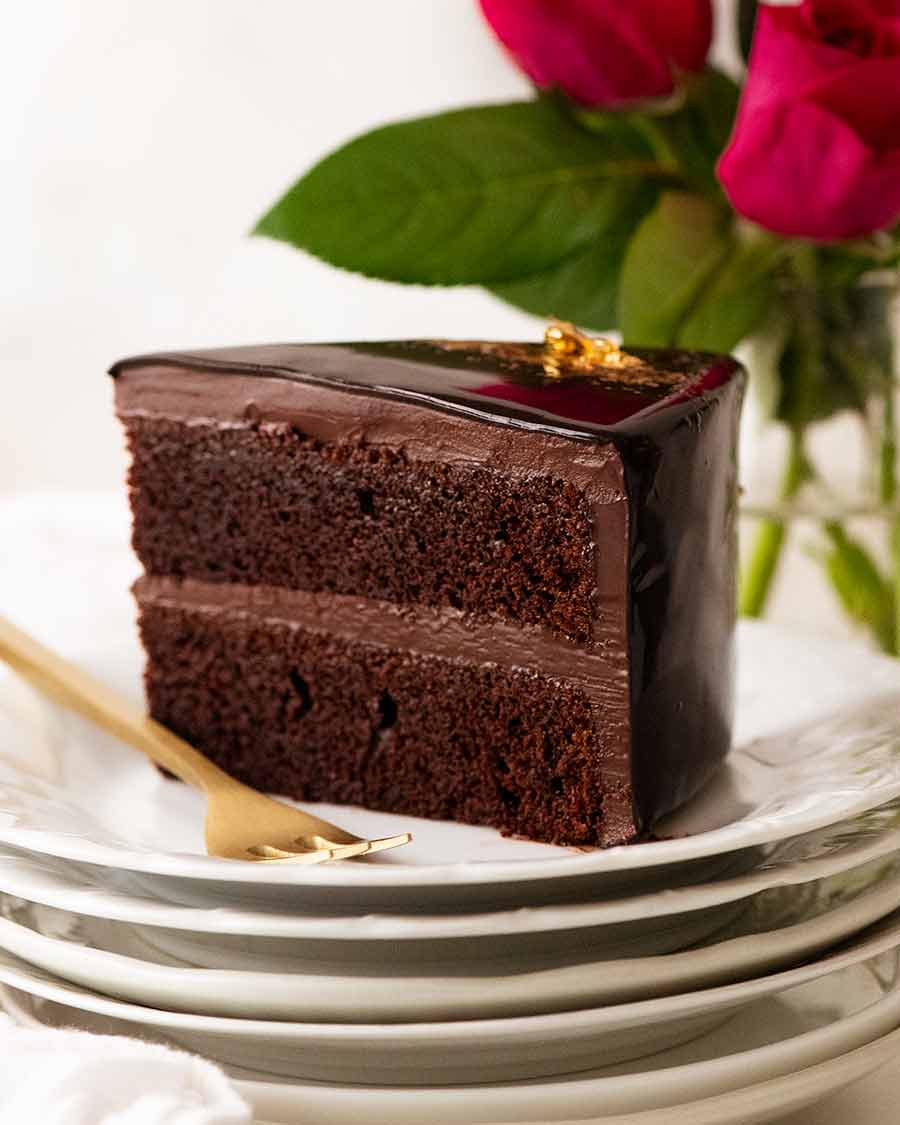
Chocolate Mirror Glaze – or Glacage Chocolat in French – is the most stunning of all cake glazes! Mirror glazes come in all sorts of wild colours, but Chocolate Glazed Mirror Cakes are the classic you see showcased in the best patisseries from Paris to Tokyo and New York.
With my easy to follow steps, you can nail it first go. No special equipment required – just a meat thermometer and strainer. (Yes, I said meat thermometer!)

Chocolate Mirror Glaze
If you’ve always wanted but been intimated by the thought of producing beautiful French patisserie style cakes, Chocolate Mirror Glaze is an excellent place to start because:
- it’s much easier than you think – it mainly calls for patience (you will read the words “cool” and “fridge” a lot!);
- you can use it on virtually any cake; and
- you don’t need any speciality ingredients or patisserie equipment – just a meat thermometer and strainer!
It’s a great show off cake, one that everyone marvels over shiny and reflective the glaze is – just like a mirror!
What makes Mirror Glazes Shiny?
The ingredient that makes Mirror Glazes so shiny is gelatin. It makes the glaze set into a shiny, thin layer of what is essentially chocolate jelly. Which might sound unappealing but when executed well (and properly!), it is supposed to be a very thin layer of soft jelly encasing a frosting or mousse underneath so the glaze literally melts in your mouth when you eat it. You barely notice it is there!
In fact, I consider Mirror Glazes to be all show. It will make a cake look impressive, but like most things in life, it’s what’s underneath that really matters!
What is Mirror Glaze made of?
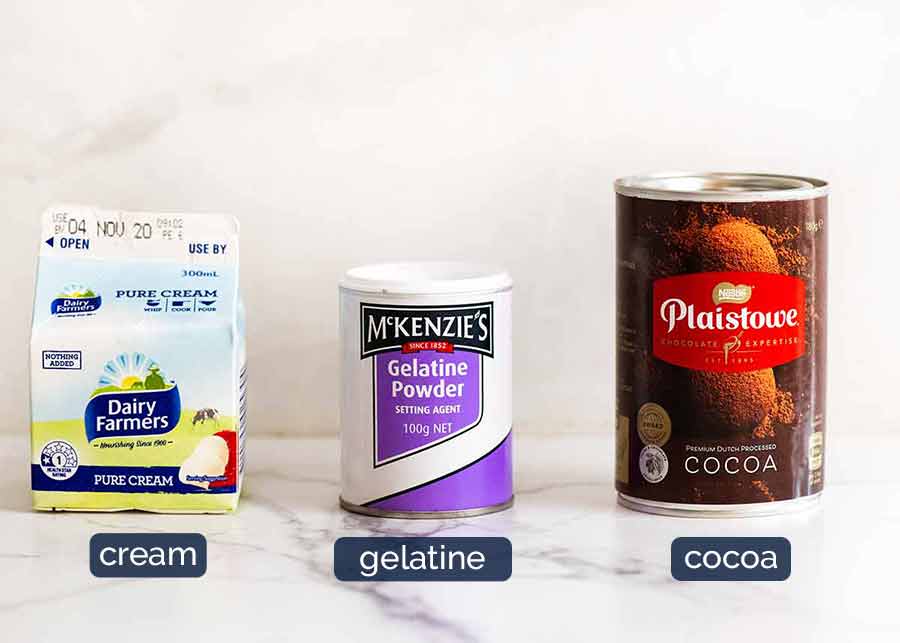
A classic Chocolate Mirror Glaze is made of gelatine, water, cream, sugar and cocoa powder.
Some recipes use melted chocolate and condensed milk, but I found they yield a thicker, less elegant Mirror Glaze that’s overly sweet. More on alternative Mirror Glazes below.
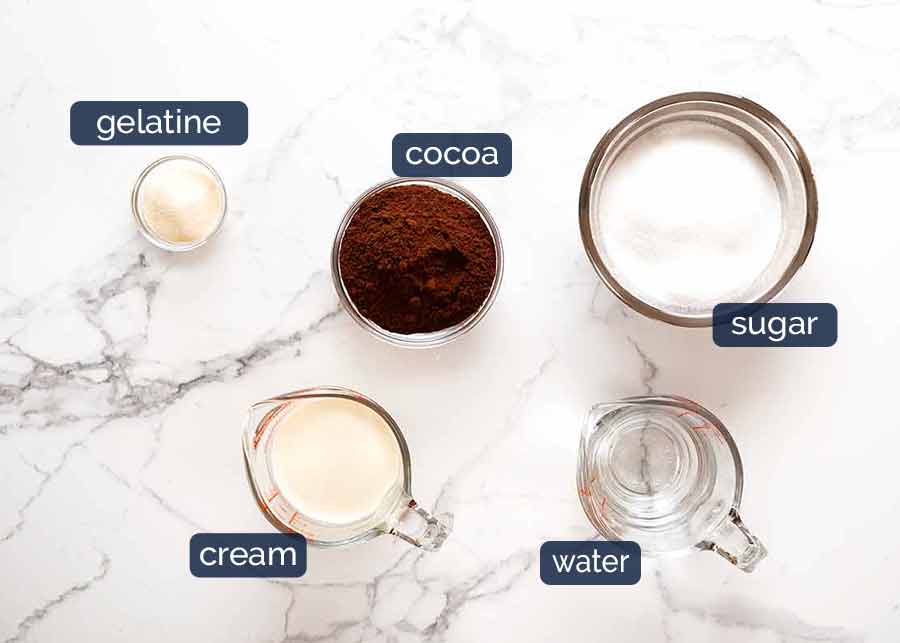
- Gelatine – while professional patisseries will use leaf gelatine, I opt for powdered gelatine because it’s more standardised gobally, affordable and still yields perfect results. Leaf gelatine comes in different grades and strengths, and also economical ones are not always reliable (as I found out during the creation of this Mango Cheesecake!);
- Cream – pure cream is best, but thickened and heavy cream work as well. Full fat – this is not the time to muck around with low fat alternatives!!!
- Cocoa Powder – dutch processed cocoa powder is best, for intensity of flavour and a deeper dark colour. However, everyday standard cocoa works 100% perfectly here and is an excellent, more economical alternative; and
- Sugar – just ordinary white sugar.
No condensed milk or melted chocolate
Some recipes call for melted chocolate and condensed milk instead of cream. This makes a thicker layer of mirror glaze which helps disguise more blemishes on the surface of the cake, but will make the glaze thicker than ideal (closer to 4 – 5 mm) so you get a bit of jelly texture and also it starts to lose its shine after about 36 hours.
The no condensed milk recipe I use was taught to me by a professional Sydney pastry chef who has worked in some of the finest restaurants in Sydney, and it’s a more technically perfect method that creates a thin 2 – 3 mm layer (as it should be!) that literally dissolves in your mouth. Plus, it stays shiny for days and days and days!
Mirror glaze actually isn’t hard to do if you’ve got some key tips that will ensure success, even if you’re a first timer, as well as some troubleshooting tricks which I have deployed many times!
More than anything, Mirror Glazed Cakes require patience. You will read the words “cool” and “refrigerate” a lot.
How to Mirror Glaze a Cake
In a nutshell, here is how to glaze the a Mirror Cake:
- Frost the cake with ganache or buttercream so it is as level as possible – see separate tutorial – How to Make Frosting and Ganache Smooth on Cakes ;
- Make the mirror glaze then let it cool so it doesn’t melt the frosting;
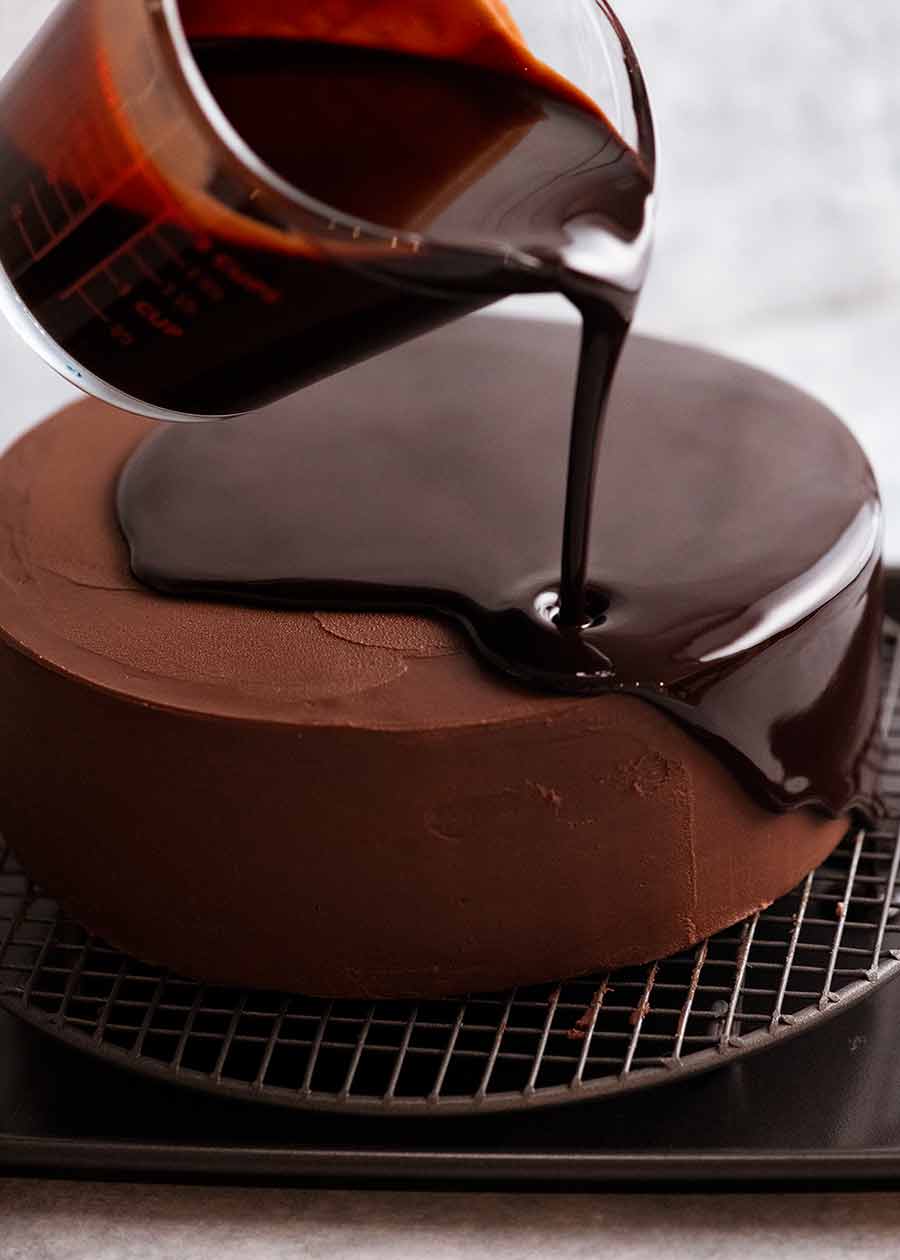
- Pour and be mesmerised by the curtain of chocolate that blankets your cake!
- Transfer the cake without messing up the glaze; and
- Fix any blemishes using a couple of handy tricks.
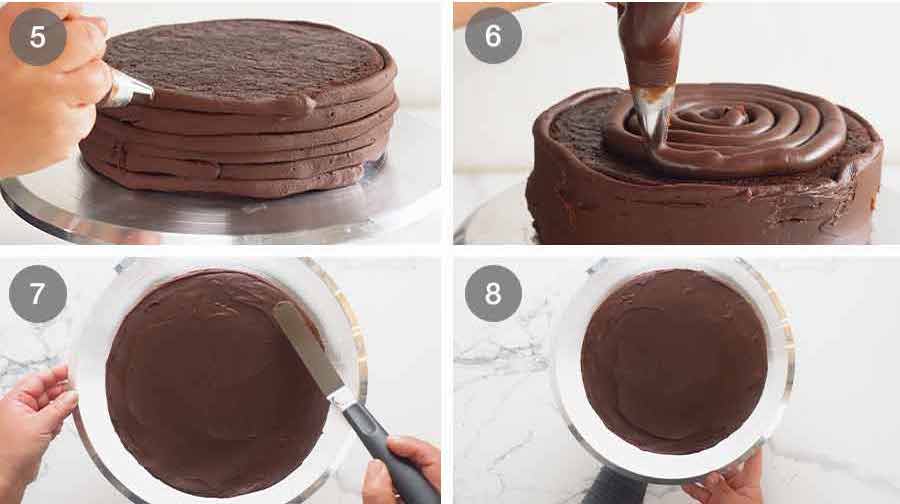
Part 1: Frosting the Cake
A flat, even cake surface is key for beautiful smooth, flawless mirror glazes because the shiny nature of the glaze makes bumps and moulds visible. See separate post for my directions for How to Make Frosting Smooth on Cakes. Here’s a little preview:
Best cake and frosting for Mirror Glazes
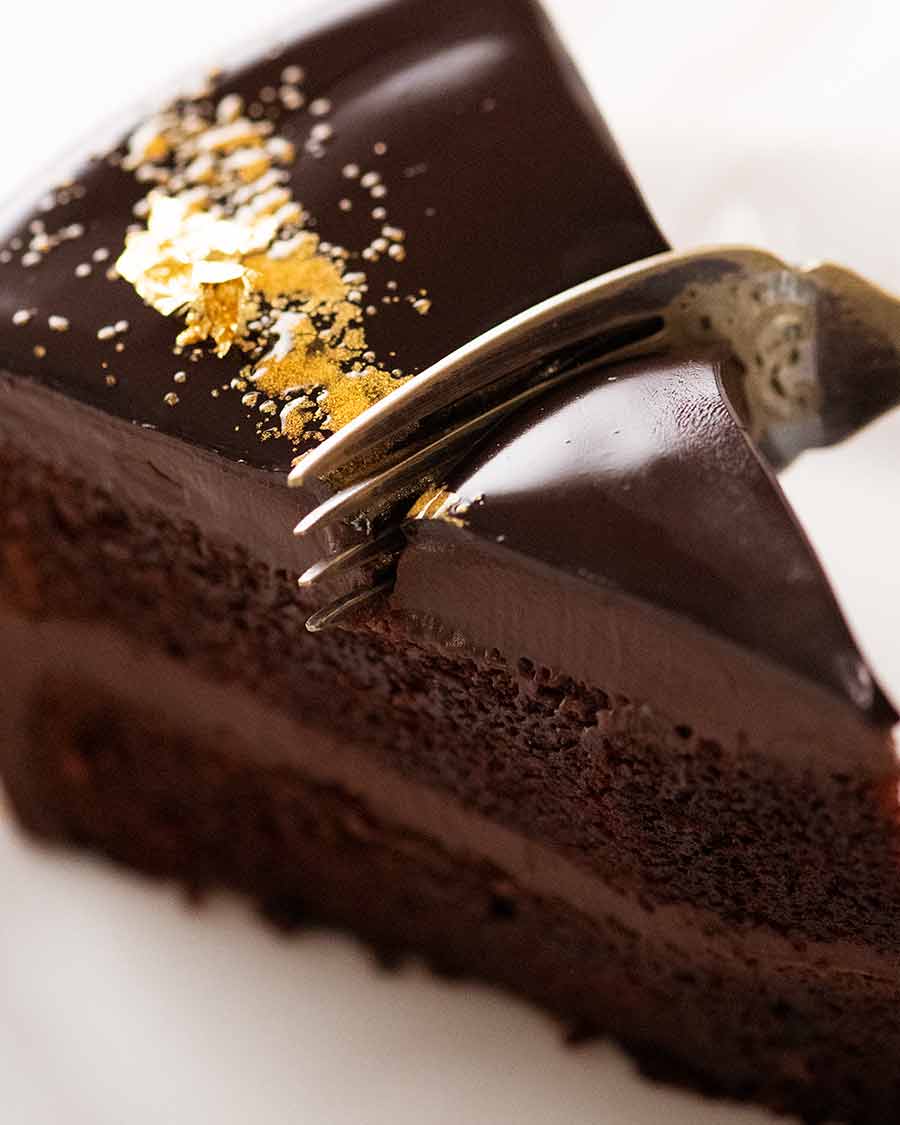
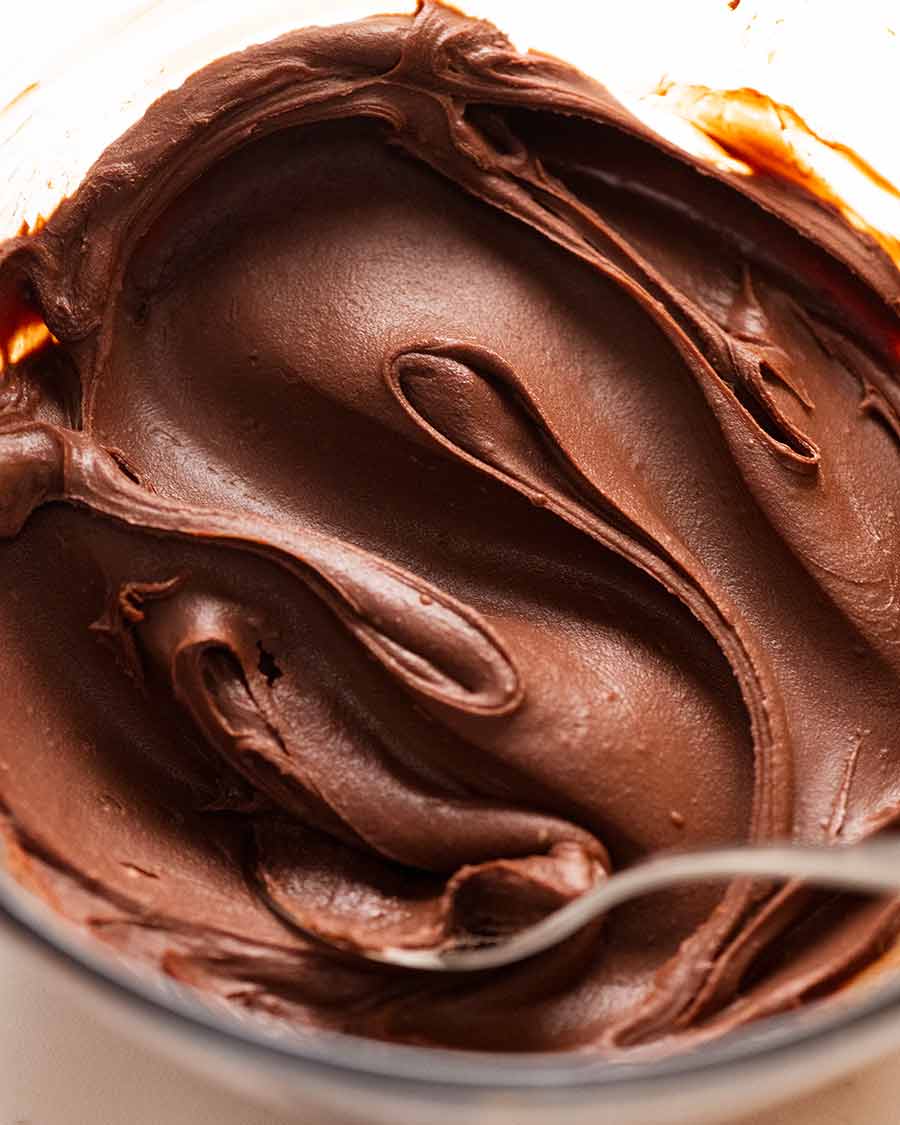
I’m using my Chocolate Cake with a chocolate ganache because it’s an elegant, classic combination with wow factor combined with the mirror glaze – both visually when you slice it, and flavour.
Cake – You can use virtually any cake that is stable – I would not recommend really soft, fragile cakes (like Chiffon Cakes) because they will be difficult to handle and prone to easily denting.
Frosting – any frosting that is dense enough so chocolate won’t sink or absorb into it, and chills so it’s pretty firm. So a fluffy meringue frosting is no good, nor is a light and fluffy mascarpone frosting.
However, a buttercream frosting or chocolate ganache is perfect.
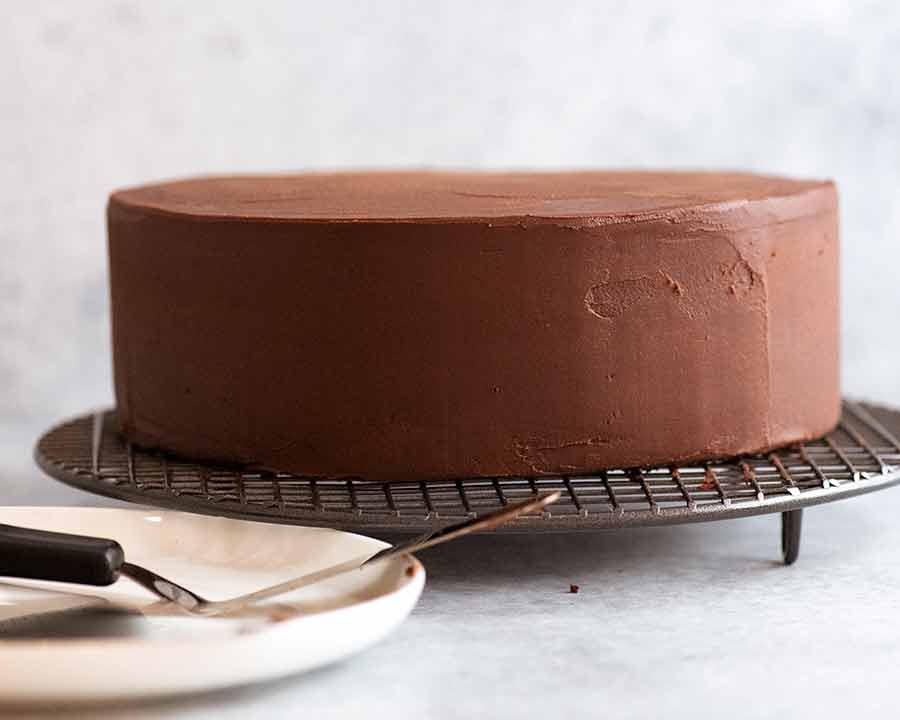
How smooth and level the cake should be for mirror glaze cakes
No matter what you are pouring the Mirror Glaze over, it needs to be as smooth and level as possible because the light reflecting off the glaze will emphasise imperfections that you never see with the usual cakes.
Check your cake by looking at it from the side. Little smears like you see on the side of the cake below don’t matter – the glaze will hide those as it runs over it. But what does matter are “hills” and dents. The light reflecting off the shiny glaze makes even the smallest mounds look so much bigger than they are!
Part 2: Making the Mirror Glaze
Making a mirror glaze is very easy IF you have a few key tips that make all the difference between success and lumpy failure:
- how to avoid gelatine lumps and bubbles in the glaze; and
- how to achieve the perfect thickness and temperature – so when you pour it, it’s not too thin or thick, and doesn’t melt the ganache.
I’ve made the mistakes so you don’t have to!
Bloom gelatine powder
Gelatine is what makes Mirror Glaze shiny. It’s very simple to use and not expensive either.
There’s no need for leaf gelatine – powder gelatine works just fine and it’s readily available everywhere.
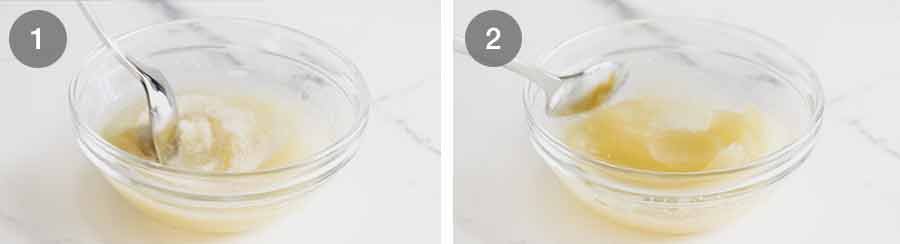
1. Bloom gelatine – put a small amount of water in a small bowl then sprinkle over gelatine.
2. Mix – it will turn into a thick paste – then leave for 5 minutes so the gelatine absorbs the water. This is called blooming gelatine and it allows the gelatine to dissolve smoothly into mixtures. If you just added the powder straight into the glaze, you’d end up with lots of lumps.
Making the mirror glaze
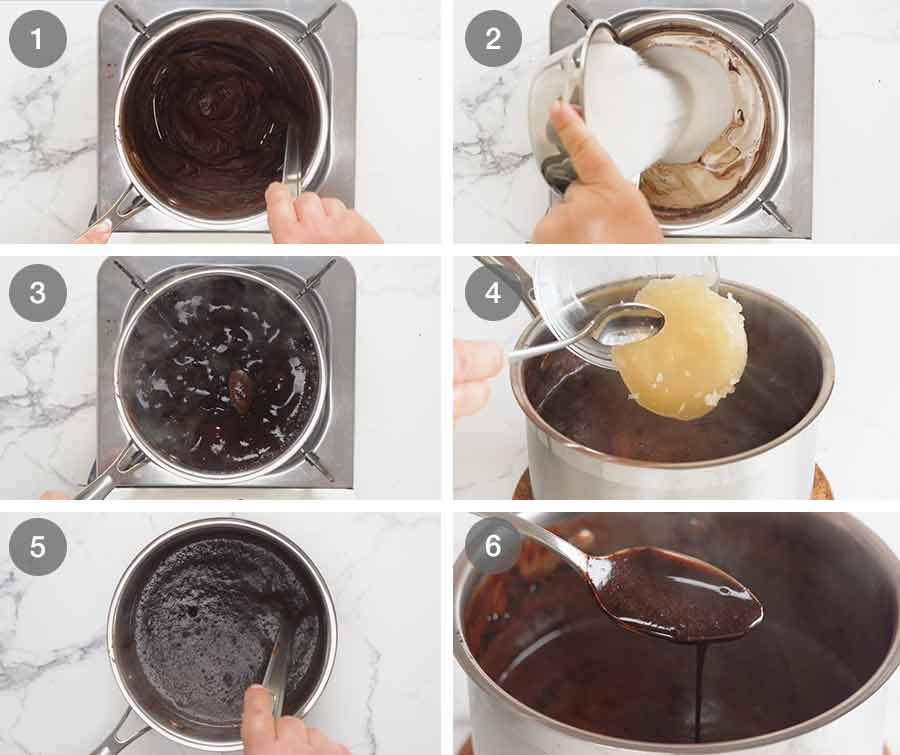
1. Cocoa and water first – In a saucepan, whisk the cocoa powder and water to make a sludge / paste. I found this to be the easiest way to dissolve cocoa powder without whisking/mixing too much which creates bubbles and ruins the finish of the glaze.
Professional pâtissiers use a blender stick / immersion blender. By keeping the head under liquid, it avoids bubbles getting into the mixture. However, this only works if you’re making large enough batches of glaze so the head is completely submerged. For a single cake, you’d need to use a milkshake container or large mason jar, then transfer into a saucepan. Honestly, just easier to mix cocoa and water first!
2. Then cream and sugar – next, mix in a bit of cream to loosen the mixture, then add the remaining cream and all the sugar. Do minimal stirs just to incorporate the cocoa sludge into the cream;
3. Boil – Bring to boil to dissolve the sugar, then take it straight off the stove;
4. Dissolve gelatine – drop the gelatine in (it will be like a rubber disc);
5. Stir GENTLY – gently stir to dissolve the gelatine lump. Do not stir vigorously and do not use a whisk, you’ll create bubbles in the glaze which will tarnish the perfect finish! It will take a minute or two but it will dissolve; and
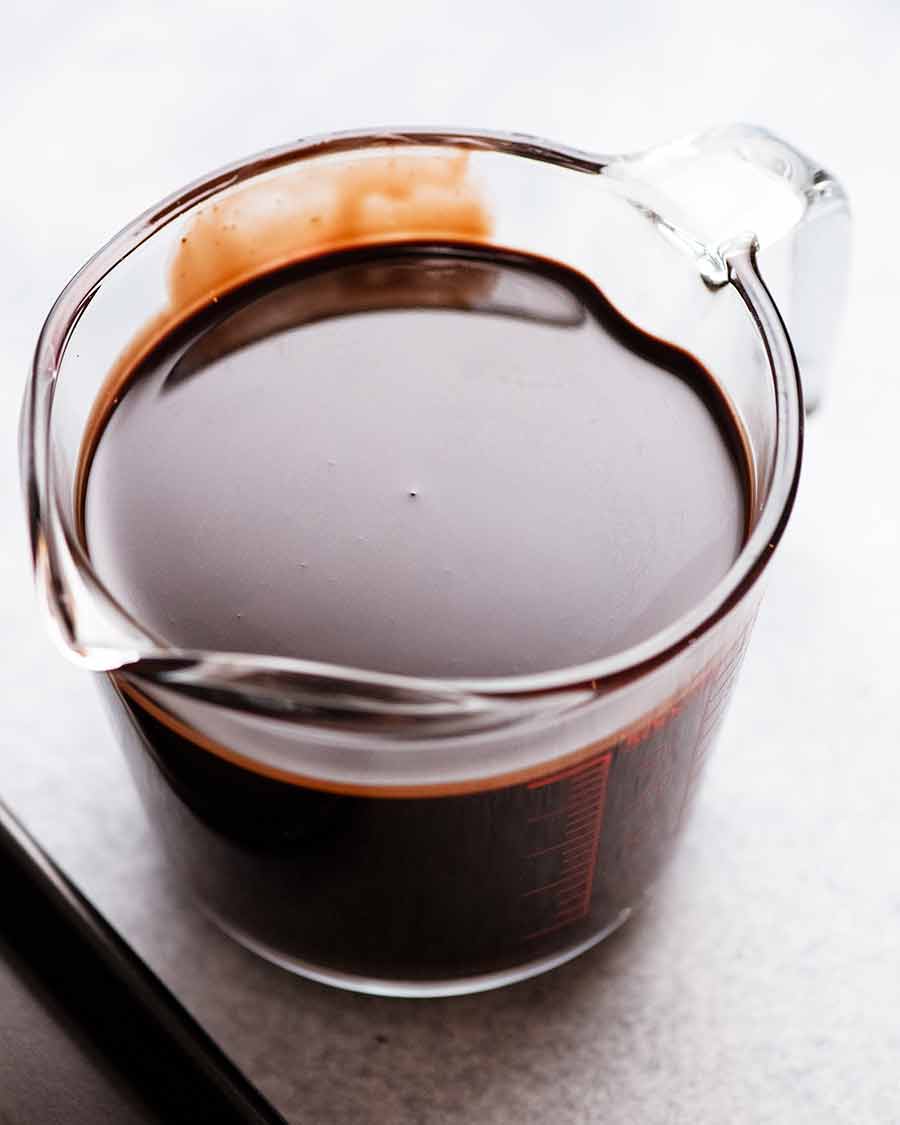
6. Glossy! The glaze should be shiny and glossy, and hopefully bubble free – but if you have bubbles, don’t worry, we can fix it in the next step. If you see foam (whitish stuff on the surface), that’s ok too – it’s easy to deal with, just leave it for now.
Strain and cool
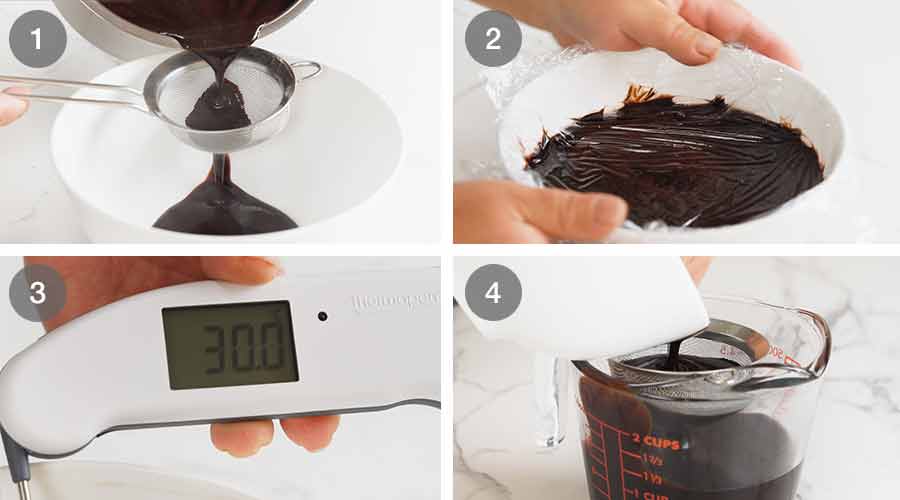
1. Strain – slowly strain the liquid into a bowl, positioning the strainer such that you minimise the distance the liquid falls from the saucepan into the strainer, and from the base of the strainer into the bowl. This will reduce the risk of bubbles being created during the straining process.
2. Cover & cool – cover the mirror glaze with cling wrap, pressing so it touches the surface to prevent a skin forming. When you peel off the cling wrap once the Mirror Glaze is cool, it will peel off any white foam that I mentioned above not to worry about.
3. Cool to 30°C / 86°F – Then leave to cool on the counter for 2 hours until it reaches 30°C / 86°F, the perfect pouring temperature so it blankets the cake smoothly without drips, won’t melt the ganache and sets in a thin 2 – 3mm layer, the perfect thickness for a mirror glaze.
- If the glaze is too hot, it will melt the ganache and slide off the cake.
- If the glaze is too cold, it won’t spread smoothly and you’ll end up with drips on the side and lines from the pools of chocolate on the top.
You don’t need a fancy candy thermometer. Just use your trusty old meat thermometer!
4. Strain into jug – once it reaches the target temperature, pour it into a jug for pouring over the cake. The purpose of this step is to remove any residual bubbles, any little bits of skin that formed while cooling and any gelatine lumps that may have formed if it wasn’t properly dissolved.
Position the strainer and tilt the jug so you minimise the distance the liquid falls so you don’t create any bubbles. I manage this on my own, but it’s easier if you get a helping hand!
Important: Only strain into jug just before using
Do not transfer the mirror glaze into the pouring jug until just before using. Too many unexpected variables can arise which may create the need / irresistible desire to stir which will create bubbles, or you will get a skin on the surface which creates unsightly lumps in the glaze.
Part 3: Glazing!
Checklist before you start pouring to ensure you nail it!
- Your glaze is at 30°C/86°F (give or take 2 degrees);
- You strained into the jug just before using it; and
- The cake was chilled for least 30 minutes.
You don’t need to be an expert with the pouring action – you can start and stop and it will still end up smooth, though you will get the most flawless finish if you can do it in one motion.

1. Place cake on rack – Transfer the cake to a rack using 2 x kitchen knives or long palette knives (or one of each!). Slide them under the cake then lift and move (see below for steps – I use this same method after glazing);
2. Place rack on tray – set the rack with the cake on a tray to catch the glaze drips;
3. Pour! Starting in the middle of the cake, pour in circulate motions, moving out towards the edge of the cake so the glaze spreads across the surface and down the sides. Pour with confidence! Don’t hesitate or do a thin stream – you want a steady stream to come out so you get a curtain of chocolate coating the sides of the cake rather than piddly little drips!
Do not touch the glaze once it is poured – anything that comes into contact with the glaze will leave a mark!
TOP TIP: Try to do it in one motion – that is, once you start pouring, don’t stop until all the sides are covered. This is the best way to ensure you get a perfect, flawless surface. Though if you need coat a patch you missed on the side, just pour down the edge of the cake to minimise risk of faint “puddle” lines on the top of the cake. Don’t worry, the surface will still be flat.
4. Transfer before it sets! The mirror glaze will start to set after about 10 minutes. So transfer the cake to a rack before it sets otherwise you’ll get little drags on the edge of the base the you pick it up (being the glaze that sticks to the rack). See next section for how to transfer the cake.
Part 4: Moving the mirror glazed cake
The most asked question when I shared a preview of this cake was – how do you move it!!
I use the same method to move the cake once the ganache is on (onto a rack for glazing) and once it is mirror glazed (from the rack to a cake platter). Here’s how:

- Palette knives or kitchen knives – Use either 2 long palette knives or 2 kitchen knives (or one of each, as I do!). Slide them under the cake about 1/4 of the way through – one from the left and one from the right;
- Lift them at the same time then move the cake onto the rack/platter;
- Push off with a 3rd knife – Place onto the rack/platter, then use a butter knife or small palette knife to slide the large palette knife/kitchen knife out neatly without making the ganache/frosting/mirror glaze untidy; and
- Voila! Tidy edges! (That’s just a smear on the cake platter your see!)
PRO TIP: Move cake asap
Move the mirror glazed cake straight after pouring the glaze on, before it sets. Otherwise you will get drags and untidy bits around the base of the cake which sets and clings to the rack!
Part 5: Tidying up blemishes
Tidying up blemishes is a useful trick to have up your sleeve with Mirror Glazed Cakes because we are after all seeking perfection here, but life doesn’t always go to plan. For example, a poof of wind blowing through the house causing a single dog hair to settle on the otherwise flawless surface of the cake (yes, I’m glaring at YOU Dozer!).
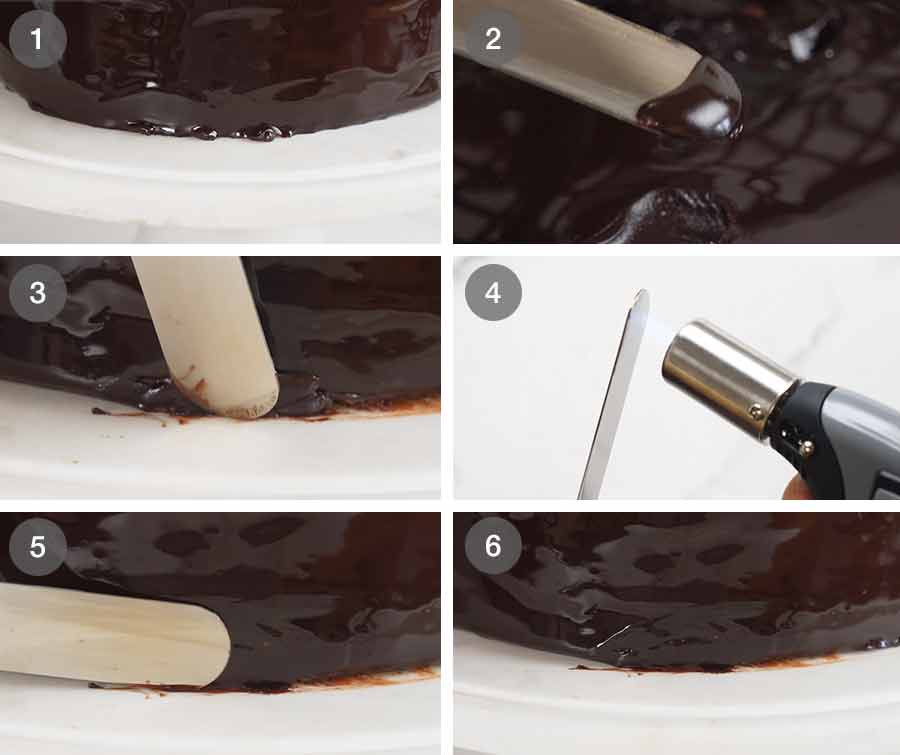
So here are some tips for how to fix Mirror Glaze blemishes:
- Wait until the glaze is set – Firstly, wait until the mirror glaze is set before attempting repairs otherwise you can make the blemish worse because the glaze is still runny;
- Use excess mirror glaze on tray or left in the jug to patch up dents and crevices;
- Smear it on / in the problem areas;
- Heat a palette knife or butter knife with a blow torch (or gas light clicker or lighter); – just briefly. Mirror Glaze melts super easily – you don’t need it to be hot. If it sizzles on contact with the mirror glaze, it’s too hot!
- Wipe across messy patched up area – don’t be too slow and don’t do it repeatedly otherwise you may melt the ganache underneath!
- Voila! It’s (practically) flawless!
Extra tips:
- Blow torch (or gas light clicker or lighter) – mirror glaze melts easily, so just lightly passing the very tip of the blow torch over a blemish will smooth out any dents. It does leave a slight blemish so you won’t have a pure flawless finish, but at least it is subtle and smooth. Don’t get too enthusiastic with the blow torch otherwise you will melt off the mirror glaze and/or the ganache underneath!
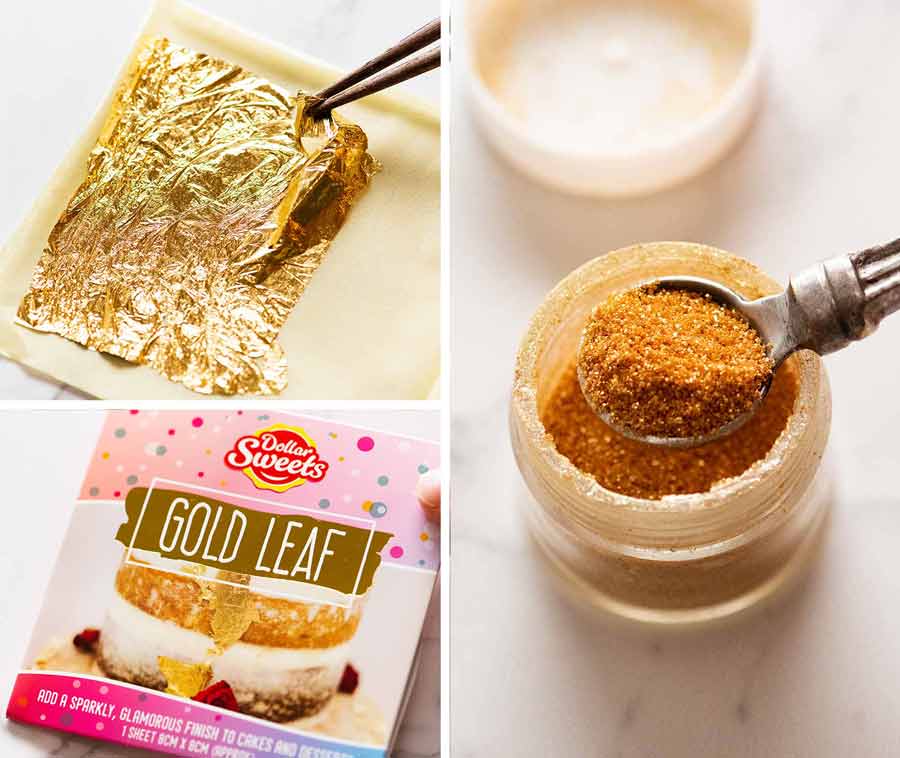
- Decorations! Never feel ashamed to use a sprinkle of gold dust or a strawberry or gold leaf to strategically cover up blemishes!
This is what I used to decorate the cake – gold leaf and gold dust, purchased from Woolworths in Australia (it’s our equivalent of Walmart in the US and Sainsbury’s in the UK).
Freezing and refrigerating Mirror Glaze
It’s worth mentioning that the Mirror Glaze itself can be made ahead and refrigerated for up to a week or even frozen. It just needs to be reheating gently then stirred very gently until it is once again smooth and pourable, then cooled to 30°C/86°F as required by the recipe.
Reheated Mirror Glazes will get bubbles in them in the stirring process – it’s inevitable, no matter how gently you stir them. But removing them is easy – just pass a blow torch or even a lighter lightly across the surface of the mirror glaze where the bubbles are, and watch in wonder as the bubbles disappear!
Also, the final strain of the Mirror Glaze into the pouring jug will strain out any nasty bubbles.
Storing Mirror Cakes
Once the Mirror Glaze has been applied, they seal the cake completely so they can be stored in the fridge and patisserie windows without having to cover them. Very appealing for practical purposes!
However, all too often, patisseries and cake makers take the shelf life benefit too far and make the mirror glaze too thick and too rubbery. Hence the beauty of homemade – so we can make it properly!
Mirror Cakes don’t even need refrigeration as long as it’s cool – the glaze melts in warm temperatures above around 25°C/ 77°C. Because it’s been really cool/cold here in Sydney while I’ve been shooting/testing out this recipe preparing to share it, I’ve just kept it under a cake dome on the counter.
And in closing…
And with that – I have now shared with you everything I know about Mirror Glazes!!
I know that’s an enormous amount of information, but the actual execution of a Mirror Glaze is not that hard. It just takes patience – lots of cooling / refrigeration.
For me personally, this has been the single most well received cake by friends and family in the 6 years since I started this website. For how professional it looks, and also the flavour. It looks so sinfully rich and yet it is not – because the Mirror Glaze is wafer thin, and the ganache layer is not that thick either.
And some final words of wisdom – so what if it’s not perfect?? Even if yours is a bit bumpy, the glaze will still be so shiny. Far more shiny than you can achieve with any other glaze or frosting. And more importantly, it is still going to taste 100% amazing! – Nagi x
Watch how to make it
Chocolate Mirror Glaze
Ingredients
- 1 x 20cm / 8" chocolate cake (2 layers) (Note 1)
- 2 batches Dark Chocolate Ganache (Note 2)
Gelatine for glaze:
- 2 1/2 tbsp water (just cold tap water)
- 4 tsp gelatine powder (Note 3)
Mirror Glaze:
- 2/3 cup water
- 2/3 cup cream , pure / regular whipping cream (Note 4)
- 1 cup cocoa powder , unsweetened, preferably dutch processed (Note 5)
- 1 cup + 2 tbsp white sugar , caster/superfine (Note 6)
Decorating (optional, as pictured)
- Gold dust and gold leaf (Note 7)
Instructions
Cake and Ganache Frosting preparation:
-
Refrigerate cake layers for at least 1 hour until well chilled (for easier handling). Then trim cake to make it level and frost cake with chocolate ganache so it's smooth and level by following the tutorial in this post: How to Frost Cakes Smoothly.
-
After the Ganache is smooth and level, refrigerate for at least 1 hour before coating with Mirror Glaze.
Make Mirror Glaze:
-
Bloom gelatine: Place water in a small bowl. Then sprinkle gelatine across surface, mix just so all the powder is wet. Leave for 5 minutes – it will become like a rubber consistency. (This is called "blooming gelatine")
-
Whisk cocoa and water: Place cocoa and water in a medium saucepan then mix until virtually lump free – it will be like a paste.
-
Add cream and sugar: Add a splash of cream then mix – it will loosen up. Add remaining cream and sugar, then GENTLY mix to combine – do not mix vigorously, do not use a whisk (Note 7).
-
Bring glaze to boil: Turn stove onto medium high heat. As soon as it comes to the boil, remove from the stove.
-
Dissolve gelatine: Add gelatine lump, then GENTLY stir until it dissolves and you have a smooth glossy glaze. There may be some white foam – that's ok.
Cool & Strain Mirror Glaze:
-
Strain 1: Using a shallow bowl and small fine mesh strainer, strain the glaze into a bowl so the glaze falls the bare minimum distance. If you pour from a height, this creates bubbles = bad!
-
Bubble Check: twist the bowl back and forth between your hands rapidly – this will make any bubbles rise and gather in the centre. If you see bubbles, see Note 8: Bubble Troubleshooting.
-
Cool glaze: Cover with cling wrap, pressing the cling wrap onto the surface of the glaze to prevent a skin from forming. Cool on the counter for 2 hours until it reaches 30°C/86°F. See Note 9 for overnight refrigeration.
-
Strain 2: Just before pouring over the cake, strain the glaze into a jug. As before, tilt the jug and strainer as you pour the glaze in to minimise the distance the glaze has to fall.
Glazing!
-
Transfer cake to rack: Remove cake from fridge, transfer onto a rack. (Note 9 for how I do it) Place rack on a tray to catch the run off.
-
Pour over mirror glaze: Starting in the middle of the cake, pour the glaze on, moving around in a circle gradually moving to the outer edge of the cake, to make the glaze spread across the surface and drape like curtain down the sides. Try to do it in one motion without breaking the pour for the most perfect surface, and pour with confidence with a thick stream rather than a thin drizzle (might set too quick and leave drips).
-
Ensure all sides are fully coated – if not, quickly do a little pour to coat the naked patches.
-
Transfer cake to platter: Before the mirror glaze sets (takes ~10 minutes), move the cake to a cake platter (Note 9 for my method).
-
Fix blemishes – use excess glaze on the tray to fill gaps / tears, then smooth over with a warm palette knife (either lightly warm with a blow torch or dip into warm water and wipe). See video for demo.
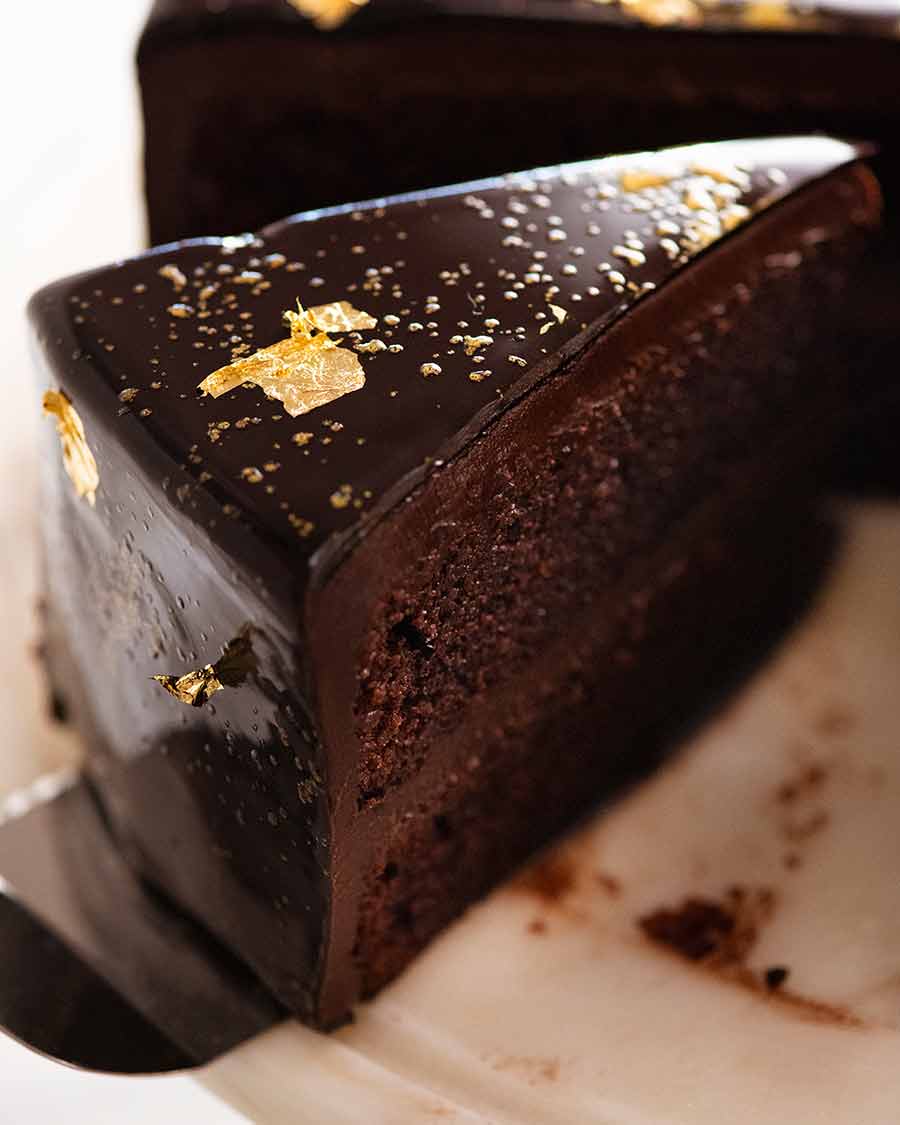
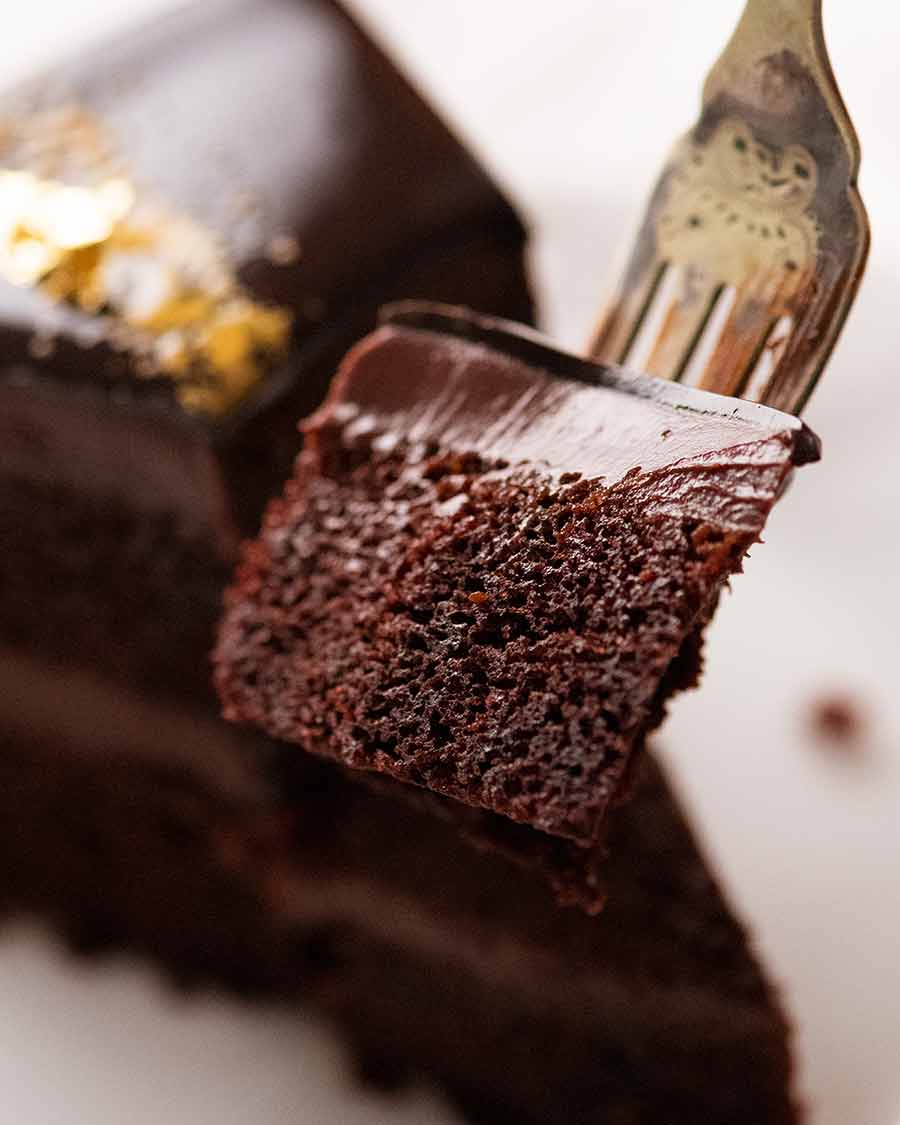
The Perfect Slice with neat layers:
-
Use a tall jug and fill with warm tap water. Dip a knife in, then wipe dry. Make one cut.
-
Then clean knife, dip in warm water, dry, make another cut to cut one wedge. Pull wedge out and marvel at the perfect layers before continuing to cut more slices! See note for storage
Notes
- The glazed cake can remain on the counter if the room temperature is 22°F/72°F or less (mirror glaze melts when too warm). Otherwise, refrigerate – you don’t need to cover an uncut cake because the mirror glaze seals it!
- Using the Chocolate Cake, this Mirror Glaze Chocolate Cake is perfect for 4 days, still excellent on Day 6 (the cake is really moist).
- The Mirror Glaze will remain shiny and sparkly for days – unlike ones made with condensed milk which lose their shine after a day or so.
Life of Dozer
No chocolate for you Dozer. And none of my Beef Pho either!!
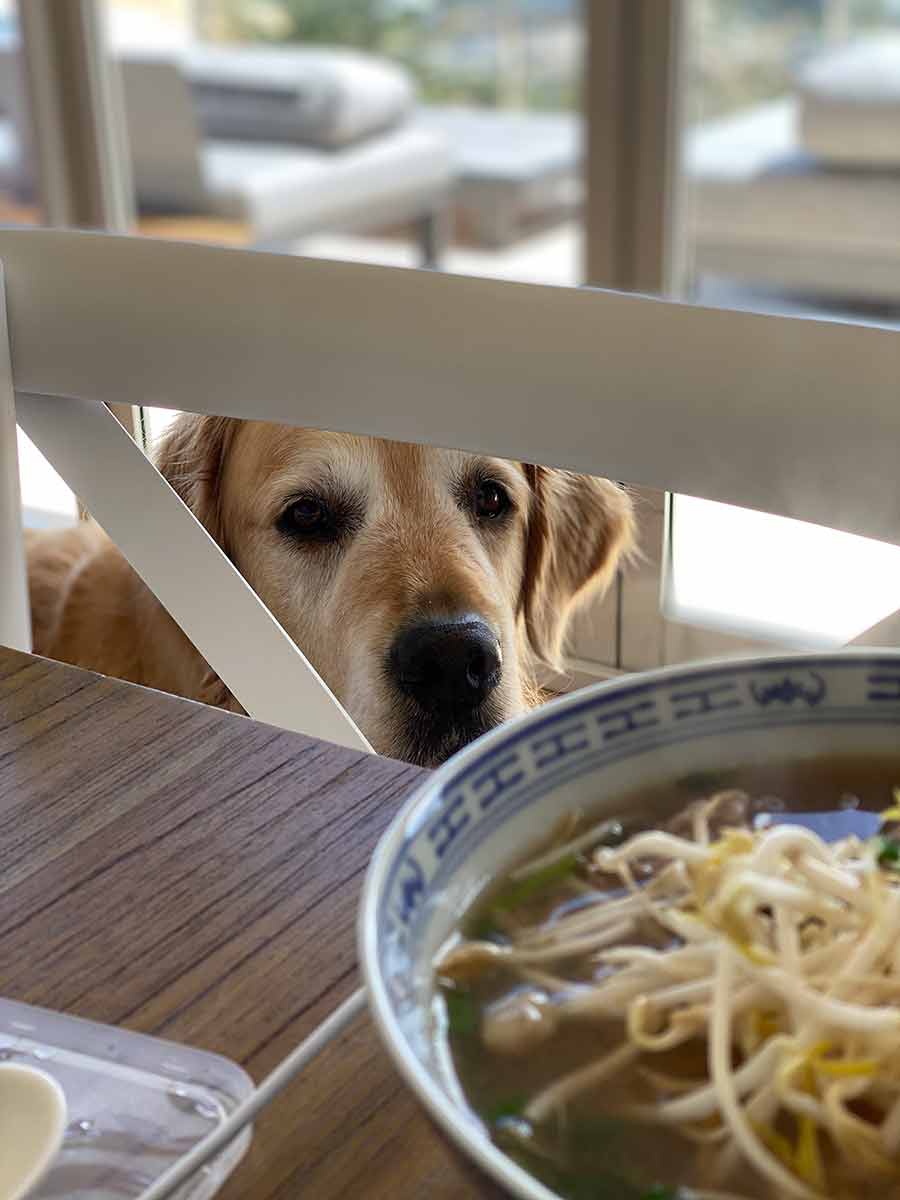
OK fine, you can have ONE noodle!
The post Chocolate Mirror Glaze appeared first on RecipeTin Eats.


0 comments:
Post a Comment